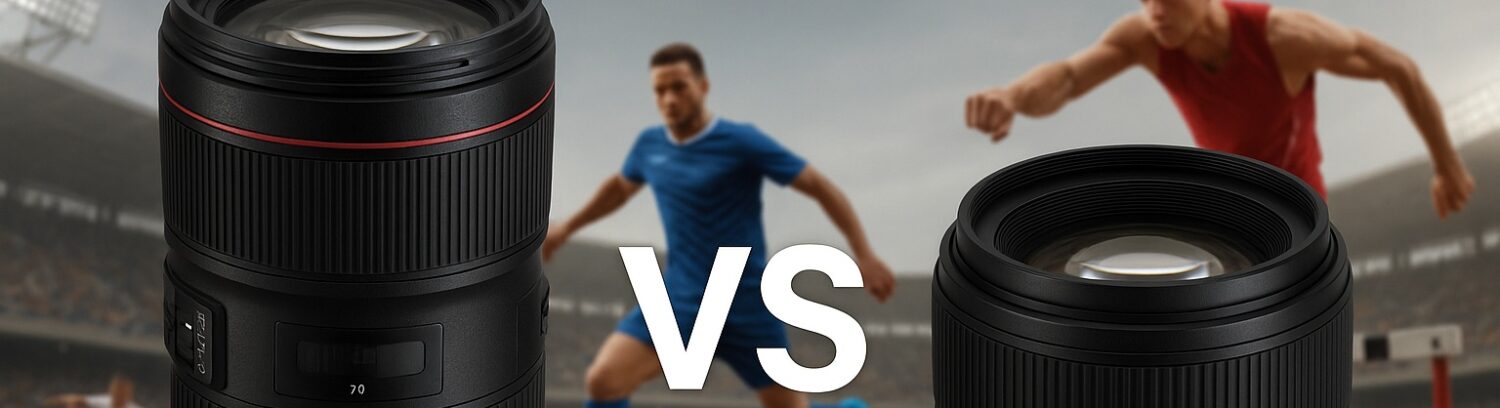
Cycling Photography: How to Capture Motion Blur & High-Speed Action

Cycling is one of the most exhilarating sports to photograph. The speed, energy, and motion present unique challenges and incredible opportunities for photographers. Capturing the perfect shot often means blending sharpness with intentional blur to convey movement. Whether you’re snapping shots at a professional race or capturing a weekend ride, mastering motion blur is essential for creating dynamic, engaging photos. In this comprehensive guide, we’ll explore tips and techniques to help you take stunning cycling action shots that stand out.

Why Motion Blur Matters in Cycling Photography

Motion blur isn’t just an artistic choice—it’s a storytelling tool. It visually communicates speed and motion, giving viewers a sense of being in the moment. Unlike freezing the action, which can feel static and lifeless, well-executed motion blur shows the cyclist’s journey, making your images more compelling and authentic.

Essential Gear for Capturing Motion Blur

Capturing motion blur requires reliable and adaptable equipment. Here’s what you’ll need to get started:

  • High-Performance Camera: Choose a DSLR or mirrorless camera that offers manual settings. These cameras allow for fine-tuned adjustments to shutter speed, aperture, and ISO.
  • Fast Lenses: Wide-aperture lenses (like f/2.8 or f/4) perform better in low light and offer the flexibility to create depth in your shots.
  • Tripod or Monopod: Stability is crucial, especially when using slower shutter speeds. A monopod can offer support while allowing for mobility, which is essential during fast-paced events.
  • Neutral Density (ND) Filters: These are helpful for maintaining slower shutter speeds in bright outdoor environments.

Camera Settings for Cycling Motion Blur

To create the perfect balance of motion and sharpness, experiment with the following settings:

  • Shutter Speed: Start with slower speeds, such as 1/60s to 1/250s, depending on how fast the cyclists are moving. Slower speeds create more pronounced blur but require more stability.
  • Aperture: A wider aperture (like f/2.8) helps maintain focus on the subject while creating a pleasing background blur.
  • ISO: Set a low ISO (100-400) in bright conditions to avoid overexposure. In low light, increase ISO but be mindful of noise.
  • Focus Mode: Choose continuous autofocus (AI Servo for Canon or AF-C for Nikon) to keep moving subjects sharp.
  • Drive Mode: Use burst shooting to capture multiple frames in rapid succession. This increases the chance of getting the perfect shot.

Techniques to Master Motion Blur

  1. Panning: One of the most effective techniques, panning involves moving your camera in sync with the cyclist’s motion. Follow the subject at the same speed, keeping them sharp while the background blurs. This technique requires practice, but the results are worth the effort.
  2. Motion Tracking: Use continuous autofocus to lock onto your subject as they move across the frame. This ensures the cyclist remains sharp even when changing direction.
  3. Experiment with Angles: Low-angle shots can exaggerate speed, while side-on perspectives emphasize forward motion. Try both to see which best suits the event.
  4. Capture the Environment: Including elements like the track, audience, or other cyclists adds context and enhances the storytelling aspect.

Post-Processing Techniques

Enhancing your motion blur shots requires thoughtful editing. Follow these tips:

  • Sharpen the Subject: Increase sharpness selectively to highlight the cyclist while maintaining the smooth blur of the background.
  • Boost Contrast and Saturation: Cycling photos often benefit from vivid colors and stark contrasts, especially in outdoor settings.
  • Reduce Noise: If high ISO settings were necessary, use noise reduction software to maintain image clarity.
  • Crop Strategically: Position the cyclist using the rule of thirds to create a balanced, dynamic composition.

Avoiding Common Mistakes

  • Freezing the Action Completely: While a sharp image may look clean, it often lacks the excitement of motion. Find a balance between sharpness and blur.
  • Underestimating Light: Fast action often requires more light. Be prepared to adjust settings as the lighting changes during the event.
  • Uninteresting Backgrounds: Busy or distracting backgrounds can detract from your subject. Use a wide aperture to blur the background effectively.

Real-World Examples

  • Road Racing: Focus on panning to capture cyclists speeding by, while the background becomes a colorful blur.
  • Mountain Biking: Use faster shutter speeds (around 1/250s) to capture dust trails and fast movements.
  • Track Cycling: Low angles paired with motion blur can highlight the intensity of sprints and turns.
source: Lawrence Carpenter

Cycling photography is all about capturing the thrill of speed and the athlete’s determination. By mastering motion blur and choosing the right settings, you can create images that are both visually striking and emotionally powerful. Keep practicing, experiment with different techniques, and most importantly, enjoy the process of capturing high-speed action!

The written content on this page was generated by ChatGPT.
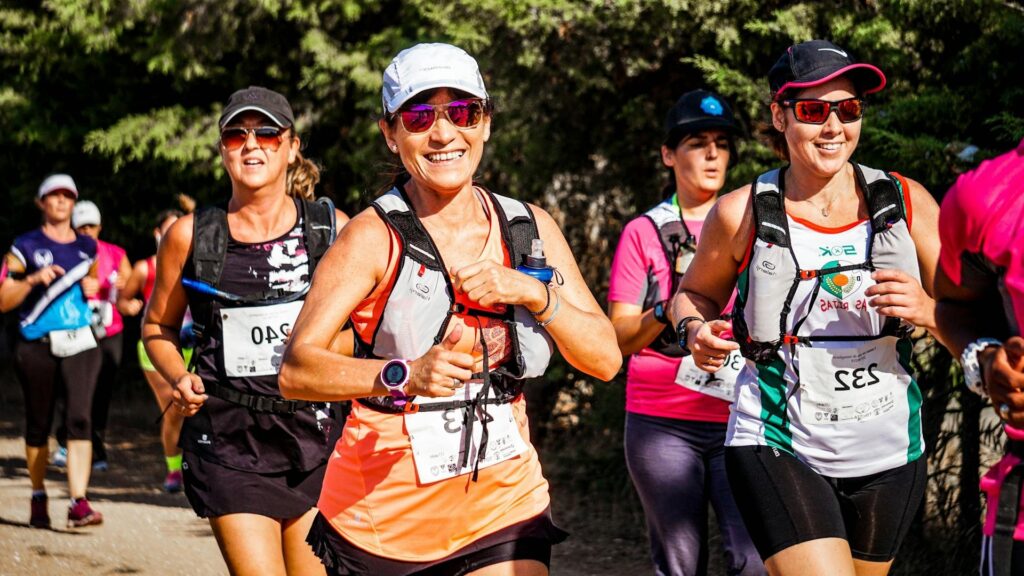
How to Take Stunning Photos at Marathons & Road Races: Pro Tips & Tricks

When it comes to capturing the thrill and energy of sports like volleyball and marathon racing, it takes more than just a good camera to get stunning shots. Whether you’re standing court-side at a high-stakes volleyball game or stationed along the marathon route as runners surge past, photographing fast-paced action requires skill, preparation, and an understanding of the sport itself. In this comprehensive guide, we’ll explore essential tips and techniques to help you create captivating images that truly capture the excitement and emotion of sporting events.

1. The Importance of Choosing the Right Gear

One of the first steps to mastering sports photography is ensuring you have the appropriate gear. Fast-paced action demands fast and reliable equipment. Consider these essentials:

  • Camera: Opt for a DSLR or mirrorless camera that offers fast autofocus (AF) and high continuous shooting speeds (at least 10 frames per second). Cameras like the Canon EOS R6 or Nikon Z6 II are popular among sports photographers.
  • Lenses: Choose lenses based on the sport and setting. A telephoto lens (70-200mm f/2.8) is perfect for volleyball, as it allows you to zoom in on the action from a distance. For marathons, a versatile zoom lens (24-70mm f/2.8) works well for both close-up shots and wide-angle views.
  • Accessories: A monopod provides stability when shooting volleyball indoors, while a lightweight, weather-resistant backpack is essential for marathon events where you may need to move frequently.

2. Dialing in the Perfect Camera Settings

To effectively capture action, your camera settings need to be spot on. Sports photography is all about balancing speed and clarity while adapting to changing lighting conditions.

  • Shutter Speed: For volleyball, use a shutter speed of at least 1/1000s to freeze the motion of spikes and blocks. For marathons, 1/500s can capture the fluid motion of running without excessive blur.
  • Aperture: In indoor volleyball settings, a wide aperture (like f/2.8) allows more light, crucial for avoiding motion blur. In outdoor marathons, you might opt for f/4 to ensure both the runner and the background are in focus.
  • ISO: Keep ISO as low as possible, ideally between 100-400 for outdoor sports. For indoor events, ISO may need to be increased to 1600 or higher to maintain fast shutter speeds without introducing too much noise.
  • Focus Mode: Use continuous autofocus (AF-C) paired with burst shooting mode to track moving subjects and increase your chances of getting a sharp shot.

3. Crafting Eye-Catching Compositions

Great sports photos aren’t just about technical skill; composition plays a vital role in telling a story. Use these techniques to create dynamic images:

  • Rule of Thirds: Instead of centering the athlete, position them off to one side to create a sense of movement.
  • Leading Lines: Use the court lines in volleyball or the road in marathons to draw the viewer’s eye to the athlete.
  • Depth of Field: For volleyball, isolate the player by using a shallow depth of field. In marathons, include the cheering crowd to convey the race atmosphere.

4. Capturing Emotion and Intensity

Emotion is at the heart of sports photography. Whether it’s the intense concentration before a volleyball serve or the exhaustion after a marathon finish, these moments add depth to your portfolio.

  • Focus on Faces: Facial expressions reveal the competitive spirit and determination of athletes.
  • Motion Blur Techniques: Create a sense of speed in marathon shots by using panning techniques—move the camera along with the runner while using a slightly slower shutter speed (1/100s).
  • Peak Action Moments: Capture decisive moments, such as a volleyball spike at the net or a runner crossing the finish line.

5. Essential Post-Processing Techniques

Even the best raw shots benefit from post-production. Focus on enhancing clarity and color while maintaining the authenticity of the image.

  • Exposure Correction: Brighten underexposed indoor shots to make the athlete stand out.
  • Sharpening: Use selective sharpening to enhance the athlete’s features while keeping the background soft.
  • Color Grading: Adjust vibrancy and contrast to make the image pop, particularly in outdoor marathon scenes.

6. Avoiding Common Pitfalls

Mistakes can turn a potentially great shot into a missed opportunity. Here are some issues to avoid:

  • Overexposing in Bright Sunlight: Use a polarizing filter to reduce glare during outdoor races.
  • Focusing Too Slowly: Prefocus on a spot where you expect action to happen rather than reacting to sudden movement.
  • Ignoring the Background: A cluttered background can distract from the main subject. Position yourself strategically to keep backgrounds clean.
source: Joe Allam

Photographing sports like volleyball and marathon racing is a challenging but rewarding endeavor. By preparing with the right gear, mastering your camera settings, and focusing on composition and emotion, you can capture stunning images that resonate with viewers. Practice, patience, and passion will help you develop your own unique style in sports photography. Get out there, experiment, and most importantly—enjoy the thrill of capturing the spirit of competition.

The written content on this page was generated by ChatGPT.

Volleyball Photography: Best Angles & Camera Settings for Dynamic Action Shots

There’s a rhythm to volleyball that’s unlike any other sport. It’s quick, tactical, and full of explosive vertical movement. One second, a player is crouched low, eyes locked on the ball; the next, they’re airborne, hand slicing through the air in a powerful spike. As a photographer, freezing that moment—when athleticism, emotion, and action align—is both the challenge and the reward.

But great volleyball photography doesn’t happen by chance. It’s crafted through thoughtful camera settings, calculated positioning, and a deep understanding of the game’s flow. Whether you’re shooting an indoor tournament or a beach volleyball showdown under the sun, this guide breaks down the best angles, gear, and techniques to help you capture dynamic, high-impact volleyball action shots.

Volleyball Photography: Best Angles & Camera Settings for Dynamic Action Shots
source: pexels.com/@kampus/

Why Volleyball Is One of the Most Visually Exciting Sports to Shoot

Volleyball is a sport of anticipation and sudden intensity. Each rally is a dance of strategy, agility, and quick reaction. Unlike sports where players move across a large field, volleyball concentrates the action in a relatively small space. That makes every movement more intense, more visible, and more photographically rich.

From the coordinated footwork of a dig to the raw power of a block, volleyball offers countless moments that beg to be captured. But it’s also unpredictable and fast, which means your camera settings and positioning have to be on point at all times.


Camera Settings for Crisp, Professional Volleyball Action Shots

1. Shutter Speed: Lock in the Peak Action

A high shutter speed is your best friend in volleyball photography. Action happens in split seconds—a jump serve, a spike, a reaction dive. Anything slower than 1/800s risks introducing motion blur.

  • Best Practice: Shoot at 1/1000s or faster
  • Pro Tip: If the gym is dark and your ISO is maxed, you can drop to 1/800s, but don’t go lower if you want crisp mid-air shots.

2. Aperture: Isolate the Subject

A wide aperture like f/2.8 or f/3.5 is ideal, especially indoors, to help isolate your subject from the background and keep shutter speeds high. A shallow depth of field creates that professional look and draws focus to the athlete in motion.

  • Use Case: When shooting close to the court, f/2.8 will let you capture individual players in sharp detail while blurring out background distractions.

3. ISO: Mastering the Light You Have

Indoor volleyball often means low-light conditions. You’ll need to bump up your ISO to maintain fast shutter speeds. Don’t be afraid of noise—modern cameras handle high ISO surprisingly well, and it’s better to have a slightly grainy image than a blurry one.

  • Typical Ranges:
    • Indoor matches: ISO 1600–3200
    • Beach volleyball in sunlight: ISO 100–400
  • Pro Tip: Use noise reduction software like Lightroom or DxO PhotoLab in post-processing.

4. Autofocus Settings: Stay Sharp in Motion

Always use continuous autofocus (AI Servo for Canon, AF-C for Nikon/Sony). Volleyball players move quickly and unpredictably, and you need your camera to track them as they jump, pivot, and dive.

  • Settings to Try:
    • Enable face and eye detection (for mirrorless cameras)
    • Use back-button focus for greater control
    • Limit AF points to center zone for faster tracking in busy scenes

Best Angles for Capturing Dramatic Volleyball Shots

Your vantage point can make or break the drama of the shot. Volleyball has height, direction, and intensity. To show those elements effectively, you’ll need to be intentional with your shooting angles.

1. Net-Level, Side Angle

Position yourself near the net but off to the side. This angle is golden for catching high-flying spikes, blocks, and net battles. You’ll often get expressions of strain, determination, or triumph in full view.

  • Best Lens: 70–200mm f/2.8
  • Pro Tip: Wait for the moment just before impact—the ball inches from the player’s hand—for maximum tension.

2. Behind the Baseline

This position allows you to capture full-body movements like jump serves, defensive dives, and play developments as players move toward you.

  • Best For: Storytelling sequences and serves
  • Tip: Use burst mode as players wind up for a serve or leap for a block.

3. Elevated Angle (Bleachers or Balcony)

Shooting from an elevated position helps frame the court and players in context. This is ideal for wide shots, team formations, and plays that unfold over time.

  • Why It Works: Adds storytelling depth by capturing game strategy, positioning, and reactions

4. Low Angle, Courtside

Crouch or lie down for dramatic perspective. Shooting upward exaggerates height and motion, making your subjects look larger-than-life.

  • Best For: Spikes, blocks, and hero shots
  • Pro Tip: Get low during breaks in play or between rallies for safety and best positioning.

Essential Gear for Volleyball Photography

1. Camera Body

Choose a camera that offers high-speed continuous shooting (at least 8fps), reliable autofocus, and good low-light performance.

  • Great Options:
    • Canon R6 / R5
    • Nikon Z6 II / D500
    • Sony A9 / A7 IV

2. Lenses

  • Indoor Matches: 70–200mm f/2.8 is king. It offers the reach and light you need.
  • Beach Volleyball: Add a 24–70mm for wider shots or a 100–400mm if you’re far from the action.

3. Extras

  • Monopod for long games
  • Fast memory cards (UHS-II recommended)
  • Extra batteries (mirrorless cameras can chew through them quickly)

Indoor vs. Beach Volleyball Photography: What’s the Difference?

Lighting

  • Indoor: Mixed lighting often leads to color cast issues—watch out for yellowish tones and set a custom white balance.
  • Beach: You’ll fight overexposure and harsh shadows. Use spot metering and lens hoods to maintain contrast.

Speed of Play

  • Indoor games are more compact and often faster-paced.
  • Beach volleyball, with only two players per team, allows for more open compositions and slightly slower movements.

Recommended Gear Differences

  • Indoor: Prioritize wide apertures for low light.
  • Outdoor: Use polarizers and UV filters for glare control.

Pro Tips for Next-Level Volleyball Shots

  • Predict the Play: Watch the setter. Great photos happen just before and after a set.
  • Capture Emotion: Reactions after a point—celebrations, frustration, encouragement—bring your images to life.
  • Don’t Forget the Ball: Shots are far more dynamic and context-rich when the ball is included in the frame.
  • Edit Strategically: Use contrast, clarity, and slight sharpening to emphasize intensity. Dodge and burn selectively to guide the viewer’s eye.
source: Paul Rutherford

Your Playbook for Epic Volleyball Shots

Volleyball photography is all about anticipation, speed, and emotion. With the right camera settings, smart positioning, and a little bit of patience, you can freeze explosive moments that reflect the spirit of the game.

Whether you’re capturing a spike from court-side or a dive from the baseline, remember: the goal isn’t just to take a picture—it’s to tell the story of the match through the lens.

The written content on this page was generated by ChatGPT.
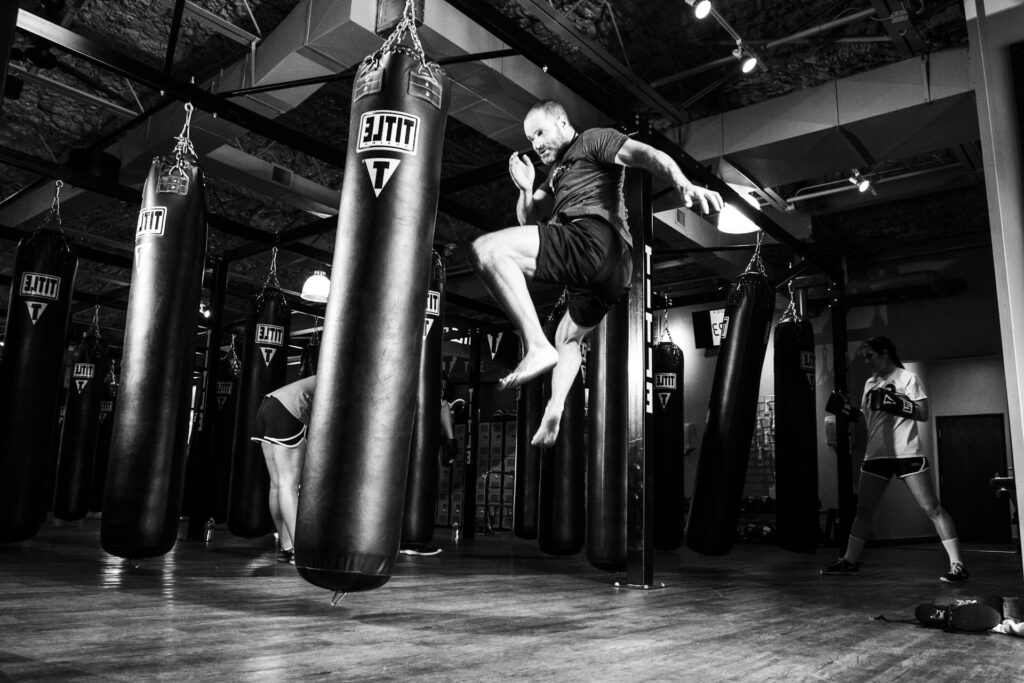
Martial Arts Photography: How to Capture the Energy & Precision of Combat Sports

In martial arts, every movement has a purpose, every stance tells a story, and every match is a dance of discipline and power. Photographing combat sports is not just about freezing punches mid-air or showcasing flying kicks—it’s about capturing the raw emotion, technique, and intensity that define each fighter’s journey.

Unlike traditional sports photography, martial arts photography demands an understanding of both timing and tradition. You’re not just documenting an event—you’re preserving moments of honor, strategy, and physical expression that often unfold in the blink of an eye.

Whether you’re shooting a local dojo sparring session or a high-profile MMA championship, this guide will show you how to take captivating, professional-quality martial arts photos that truly capture the energy and precision of combat sports.

Why Martial Arts Photography Stands Apart

Martial arts spans a wide range of styles—each with its own rules, pace, and aesthetic. From the explosive striking of Muay Thai to the ground-based grappling of Brazilian Jiu-Jitsu, each discipline presents unique photographic challenges.

Unlike team sports where the action flows across a wide field, combat sports keep the focus tight. The action is concentrated between two fighters, often in confined spaces with limited light and fast-paced movements. Your job as a photographer is to anticipate, adapt, and deliver images that showcase technique, power, and emotion—sometimes all in the same frame.


Essential Gear for Martial Arts Photography

1. Camera Body

Choose a camera with fast autofocus, high ISO performance, and fast continuous shooting. Mirrorless models like the Sony A7 IV, Canon R6, or Nikon Z6 II are great choices for speed and low-light capability.

2. Lenses

  • 70-200mm f/2.8: Ideal for close-ups from a distance, especially in a cage or ring.
  • 24-70mm f/2.8: Great for general coverage, walk-around shots, and ringside photography.
  • Prime lenses (e.g., 85mm f/1.8): Useful for pre-fight portraits or atmospheric detail shots.

3. Accessories

  • Extra batteries & memory cards: Action sequences fill up cards fast.
  • Monopod: Helps with stability without restricting mobility.
  • Lens hoods: Reduce glare from overhead lights.

Best Camera Settings for Martial Arts Events

Shutter Speed: Freeze the Fight

Combat sports move fast—blink and you’ll miss it. Use shutter speeds of 1/1000 sec or faster to capture punches, kicks, and takedowns without blur. Slower action like grappling might allow for speeds around 1/500 sec.

Aperture: Control the Light and Focus

A wide aperture like f/2.8 lets in more light and creates a shallow depth of field, helping to isolate the subject and blur out distractions in the background.

ISO: Be Flexible in Low Light

Combat sports are often held indoors with uneven lighting. Be prepared to increase your ISO—1600 to 6400 is common. Prioritize exposure and focus sharpness, then reduce noise in post-processing.

Autofocus Mode

Use continuous AF (AI Servo/AF-C) to track moving subjects and back-button focus to separate focus from your shutter for faster response.


Timing and Anticipation: The Heart of Action Photography

In martial arts, the best shots happen in fractions of a second. Unlike posed photos, there are no do-overs—so you must be ready.

Study the Sport

Know the rhythms of the fight. If you understand when a fighter is setting up for a roundhouse kick or positioning for an armbar, you’ll be ready to capture the key moment before it happens.

Use Burst Mode Wisely

Shooting in high-speed burst mode helps you catch the peak of action, but don’t “spray and pray.” Time your shots and track the fighters’ movement patterns to be in the right place at the right time.

Focus on the Eyes

Whether it’s intensity before a strike or vulnerability after a missed move, the eyes reveal emotion. Locking focus on the face often results in more compelling, story-driven images.


Positioning: Where You Shoot From Matters

Where you stand affects everything—the background, angle, and composition.

Ringside or Mat-Level

Being close brings intimacy to your shots. From this position, you can capture the force of contact, facial expressions, and the drama of close-quarters combat.

Corner Angles

Standing at a corner gives you more diagonal perspective and depth. You’ll often avoid the referee blocking your frame while also capturing both fighters clearly.

Elevated Views

From a balcony or raised platform, you can show the geometry of grappling or the overall motion patterns of fighters.

Always respect the event staff and fighters’ safety—never obstruct or interfere with the match.


Capturing Emotion and Context

Don’t just shoot action—shoot the story.

  • Pre-fight Rituals: Moments of meditation, hand wrapping, or face-offs.
  • Corner Coaching: Strategy being whispered between rounds.
  • Victory & Defeat: Raised hands, emotional outbursts, or silent exhaustion.

These shots provide context and emotion that make your collection feel complete and human.


Post-Processing: Make Your Shots Pop

Color Correction

Arena lighting can skew color temperature. Correct white balance and adjust skin tones to look natural.

Contrast and Sharpness

Combat shots benefit from high clarity and sharpness—accentuate sweat, muscle tone, and movement.

Selective Cropping

Crop to enhance focus on key details—like a clenched jaw, locked arms, or explosive contact.

Black and White Conversions

Consider converting select images to black and white to add drama and timelessness, especially in moments of stillness or fatigue.


Common Pitfalls in Martial Arts Photography

  • Using Flash: It’s usually forbidden during matches and can disrupt fighters.
  • Sticking to Auto Mode: You’ll miss opportunities to adapt to light and movement.
  • Neglecting Storytelling: Not every great photo is of a punch—capture the buildup, the aftermath, and the atmosphere.

Pro Tips from the Pros

  • Arrive Early: Scope out lighting conditions and ideal shooting spots.
  • Shoot in RAW: Gives you more flexibility in editing.
  • Build Rapport with Fighters: Respect builds trust, which opens the door to more candid, emotional moments.
  • Keep Learning: Analyze fight footage, attend different martial arts events, and follow experienced photographers for inspiration.
source: MARTiALYOU

The Art Behind the Action

Martial arts photography is a fusion of speed, instinct, and respect for the sport. When done well, your photos do more than freeze a kick in midair—they capture the heartbeat of competition, the silence before impact, and the strength in stillness.

As you grow in your craft, you’ll learn to not just take pictures—but to tell stories. Stories of warriors in motion, of inner strength, and of moments where time seems to stop.


Frequently Asked Questions (FAQs)

What are the best settings for indoor martial arts photography?

Use a shutter speed of at least 1/1000 sec, a wide aperture (f/2.8), and increase ISO as needed (1600–6400) depending on lighting conditions.

Can I use a flash in martial arts events?

Typically no. Most venues prohibit flash as it can distract fighters and violate event rules. Always ask organizers beforehand.

How do I get permission to shoot at martial arts events?

Contact event organizers ahead of time to request media access. Include a link to your portfolio and be professional in your communication.

Is martial arts photography profitable?

Yes, especially if you work with fighters, gyms, or event promotions. Offering digital packages, prints, and social media content can open multiple income streams.

The written content on this page was generated by ChatGPT.
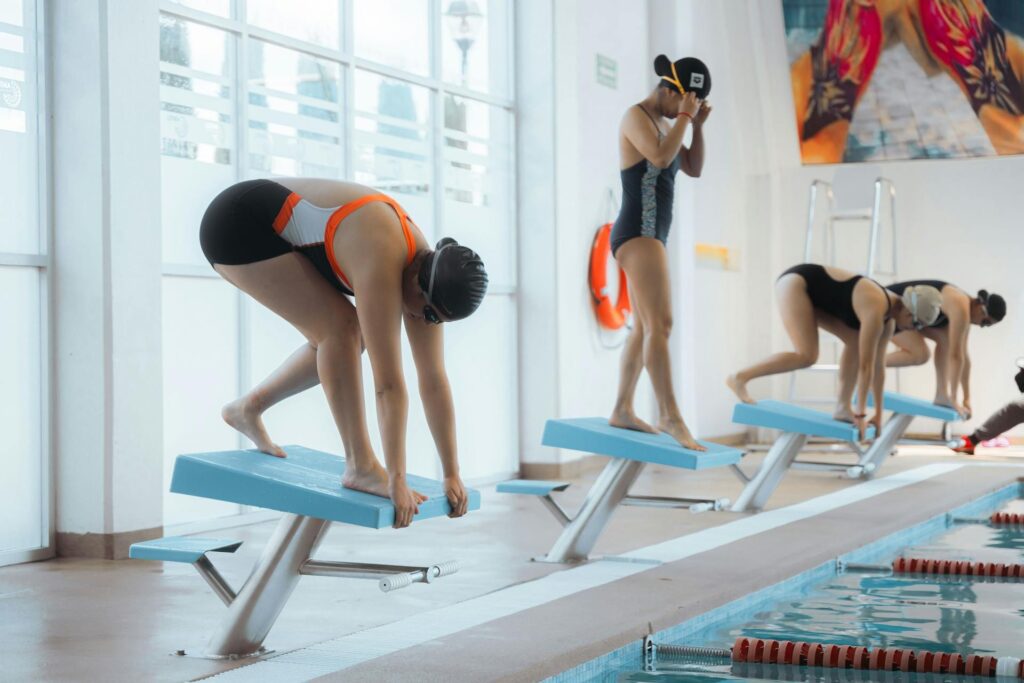
How to Photograph Swimming Events: Overcoming Water Reflections & Fast Motion

Swimming events are visually captivating, filled with dynamic motion, water splashes, and intense athleticism. However, photographing these fast-paced events can be challenging due to two main factors: the reflective nature of water and the rapid movements of the athletes. Whether you’re capturing a competitive race or a training session, mastering the techniques to overcome these challenges will elevate your photography and help you create memorable, high-quality images.

In this post, we will dive deep into the essential strategies and techniques that will help you capture stunning swimming photos. From minimizing water reflections to freezing or creatively capturing fast motion, we’ll explore how you can take your swimming photography skills to the next level.

The Art of Capturing Swimming Events

Swimming photography requires a unique skill set that combines technical know-how with creativity. Unlike other sports, swimming involves not only fast-moving athletes but also a constantly changing environment due to the water’s reflective surface. To capture the essence of the race and the swimmer’s form, it’s essential to learn how to adapt your camera settings, composition, and shooting techniques to these specific challenges.

The beauty of swimming photography lies in its ability to freeze dramatic moments—whether it’s the explosive dive at the start, the determined strokes of the swimmer, or the powerful finish. But with water and motion at the forefront, the pursuit of clarity and sharpness in each shot becomes a meticulous balancing act. Fortunately, with a few key strategies, you can confidently tackle these obstacles.


Understanding the Key Challenges in Swimming Photography

There are several unique challenges when photographing swimming events, but the two most prominent are:

  1. Water Reflections: Water, by nature, reflects light and surroundings, often creating distractions in your photos. These reflections can distort your shots, making it difficult to capture a sharp, well-composed image of the swimmer. Managing reflections effectively is crucial to producing clean and focused images.
  2. Fast Motion: Swimming involves high-speed movement, whether it’s the swiftness of a swimmer’s stroke or the water splashing up in the air. Capturing these moments in perfect detail requires quick reflexes, appropriate camera settings, and the ability to predict when the most dramatic shots will unfold.

Understanding these challenges and having a strategy to overcome them is the first step to becoming a successful swimming photographer. Let’s dive into how you can conquer both.


Essential Gear for Swimming Photography

To get the best shots in a swimming environment, you need to have the right equipment. The following gear recommendations will help you effectively tackle the challenges posed by water and fast movement:

1. A High-Speed Camera with Burst Mode

A camera that can handle high-speed shooting is essential for capturing the fast action of swimming events. Cameras with a burst rate of 8-10 frames per second (fps) or more are ideal for sports photography. This allows you to snap multiple images in a split second, increasing your chances of getting the perfect moment frozen in time.

2. Telephoto Lenses for Action Shots

Swimmers often compete across large pools, making it essential to have a telephoto lens that can bring you close to the action from a distance. A lens with a focal length between 70-200mm is ideal for versatile shooting, while longer lenses like 300mm or 400mm offer an even greater range if you’re shooting from the stands or sidelines.

3. A Fast Shutter Speed for Sharp Images

To freeze the motion of fast-moving swimmers, a fast shutter speed is a must. Aim for a minimum of 1/1000 sec or faster, depending on the speed of the swimmers. A faster shutter speed ensures the swimmer is captured in sharp detail, and water splashes are frozen crisply in the frame.


Tackling Water Reflections for Clear Photos

Water reflections can add beauty to an image but can also create distractions that obscure your subject. Here’s how to minimize unwanted reflections and focus on the swimmer:

1. Avoid Direct Sunlight

Direct sunlight creates harsh reflections on the water’s surface, often distracting from the swimmer. Position yourself with the sun behind you, or shoot on overcast days when the lighting is softer and more even. Avoid shooting directly into the sun unless you’re aiming to create a specific effect with backlighting.

2. Use a Polarizing Filter

One of the most effective tools to reduce reflections on the water’s surface is a polarizing filter. This filter helps minimize glare, making the swimmer and water look clearer. It also enhances colors and contrasts, giving your shots a more vibrant and professional appearance.

3. Shoot from Low Angles

A low-angle shot, taken near the water’s surface, helps reduce the reflection of the pool’s surroundings. This perspective allows you to focus entirely on the swimmer and the water’s texture, eliminating distractions. By positioning yourself just above water level, you can eliminate the reflections of lights and people on the surface.


Freezing Fast Motion: The Key to Action Shots

Fast motion is a hallmark of swimming events. From the explosive dive to the rapid strokes of the swimmer, capturing these moments with precision and clarity is essential. Here’s how to manage the speed of the action:

1. Use a Fast Shutter Speed

A fast shutter speed is critical for freezing the action in swimming photography. For most sports, a speed of 1/1000 sec or faster is recommended to capture the swimmer in motion with minimal blur. If you want to freeze fast strokes or splashes, you may need to increase your shutter speed even further, depending on the swimmer’s speed.

2. Consider Panning for Motion Blur

While freezing motion is often the goal, you can also create a sense of movement by using a technique called panning. This involves using a slower shutter speed (e.g., 1/500 sec) while moving your camera in sync with the swimmer’s motion. The result is a sharp swimmer with a blurred background that conveys the speed and energy of the sport.

3. Pre-Focus and Anticipate the Action

Anticipating when the swimmer will perform a significant movement, like a turn or dive, will give you the best chance of capturing that moment. Focus your camera on the swimmer’s expected position and use continuous autofocus (AI Servo or AF-C) to maintain sharp focus throughout the action. This way, you’re ready for the perfect shot when the swimmer reaches that pivotal moment.


Post-Processing Your Swimming Photos

Even the best photographers rely on post-processing to enhance their images. In swimming photography, editing plays a critical role in removing distractions, improving color, and highlighting the subject. Here are some key tips for editing swimming photos:

1. Adjust Exposure and Contrast

Water can create bright highlights, so you’ll need to adjust exposure to ensure your image is balanced. Increasing contrast will also bring out the details in the swimmer’s body and movements, helping them stand out against the water.

2. Enhance Colors and Saturation

Use post-processing software like Lightroom or Photoshop to boost the colors in your shot. Enhancing the vibrancy of the swimmer’s gear and the pool’s blue tones can make the image more visually striking without oversaturating the colors.

3. Crop for Composition

Sometimes, cropping your image can help improve its overall composition. Cut out unnecessary distractions from the edges of the frame and focus more on the swimmer’s motion. By using the rule of thirds or central composition, you can emphasize the swimmer’s action and create a stronger image.

source: Jeff Cable

Perfecting Swimming Photography

Mastering swimming photography requires patience, practice, and a deep understanding of both technical and creative aspects of the craft. By utilizing the right gear, adjusting your camera settings for fast motion, and employing strategies to manage water reflections, you can capture stunning photos that showcase the beauty of swimming and the athletes’ skill.

Whether you’re photographing an intense race or a more casual swim meet, these tips will help you overcome the challenges of the sport and produce professional-quality images. With continued practice and these techniques in your toolkit, you’ll soon find yourself capturing powerful, breathtaking moments from the water’s edge.


Frequently Asked Questions (FAQ)

1. How can I prevent blurry photos when photographing swimming?

The key is to use a fast shutter speed (1/1000 sec or higher) and shoot in continuous autofocus mode. Additionally, anticipate key moments in the race and be ready to shoot in burst mode.

2. What lens should I use for photographing swimming events?

A telephoto lens in the 70-200mm range is ideal for getting close-up shots of swimmers from a distance. For even more reach, a 300mm or 400mm lens may be necessary if you’re shooting from further away.

3. Can I use my smartphone for swimming photography?

While smartphones can produce decent results, they lack the speed and control of professional cameras. If you’re using a smartphone, opt for burst mode and ensure you have good lighting to avoid grainy images.

By applying these techniques, you’ll be well on your way to capturing stunning swimming photographs that not only showcase the athletes’ athleticism but also the beauty and energy of the sport itself. Happy shooting!

The written content on this page was generated by ChatGPT.

Motorsports Photography: How to Capture Speed & Motion Like a Pro

Motorsports photography is an adrenaline-fueled challenge that blends technical skill with artistic vision. Whether you’re shooting high-speed Formula 1 races, dirt-spraying rally cars, or motocross riders mid-air, the goal is to capture the essence of speed, power, and action in a single frame. But how do you freeze a moment of intense motion while conveying the rush of the race?

Mastering motorsports photography requires the right gear, camera settings, and composition techniques. This guide will help you understand how to photograph high-speed action like a pro, ensuring every shot tells a compelling story.

Essential Gear for Motorsports Photography

Before hitting the track, make sure you have the right gear:

  • DSLR or Mirrorless Camera: A high-speed camera with fast autofocus capabilities is essential.
  • Telephoto Lens (70-200mm or 100-400mm): Helps you zoom in on the action while staying at a safe distance.
  • Fast Memory Cards: High-speed cards (UHS-II or CFexpress) are crucial for shooting continuous bursts.
  • Monopod: Stabilizes your shots while allowing mobility.
  • ND Filters: Useful for controlling exposure in bright conditions.

Camera Settings for Capturing Speed & Motion

1. Use a Fast Shutter Speed for Sharp Shots

To freeze the action and capture crisp details, use a shutter speed of 1/1000s or faster. This ensures that every movement, from spinning wheels to flying dirt, is captured sharply.

For a balance between clarity and slight motion blur, adjust your shutter speed between 1/500s – 1/800s, depending on the speed of the subject.

2. Master Panning for a Motion Blur Effect

Panning is an essential technique in motorsports photography that keeps the subject sharp while blurring the background, emphasizing movement.

  • Use a shutter speed between 1/125s – 1/250s.
  • Track the moving vehicle smoothly while pressing the shutter.
  • Keep a steady motion to blur the background while keeping the subject in focus.

3. Optimize Autofocus Settings

Capturing high-speed motion requires precise focus.

  • Continuous Autofocus (AI-Servo/AF-C): Keeps moving subjects in focus.
  • Back-Button Focus: Prevents the camera from refocusing when pressing the shutter.

4. Adjust ISO for Lighting Conditions

Lighting changes rapidly at motorsports events, so adjusting your ISO is crucial.

  • Bright daylight: ISO 100-400
  • Cloudy or low-light races: ISO 800-1600

Composition Tips for Dynamic Motorsports Photos

1. Frame for Impact

A well-composed shot makes all the difference. Use the rule of thirds to create balanced compositions and capture vehicles entering the frame rather than leaving it.

2. Experiment with Angles

Shooting from different perspectives enhances the drama of the race.

  • Low-angle shots emphasize speed and power.
  • Overhead shots from grandstands provide a unique perspective.

3. Capture Motion Elements

Motion blur is just one way to show speed. Elements like dust, tire smoke, or flying debris add intensity to your shots. Additionally, photographing pit stops and team interactions helps tell a more complete story of the race.

Best Times and Locations for Motorsports Photography

The best photos often come from strategic locations. Here are some prime spots to capture motorsports action:

  • Turns and Corners: Great for dynamic angles and dramatic action.
  • Pit Lane: Captures intense moments between drivers and teams.
  • Start/Finish Line: Ideal for crucial moments like race starts and finishes.
  • Golden Hour (Sunrise/Sunset): Provides warm lighting and striking shadows.

Post-Processing Tips for Enhancing Your Shots

Even the best motorsports shots benefit from post-processing tweaks. Here are some essential editing techniques:

  • Increase Contrast & Clarity: Enhances the details and sharpness.
  • Adjust Saturation: Boosts the colors of the cars and environment.
  • Crop for Composition: Focus on the subject by removing distractions.
  • Use Motion Blur (if needed): Adds more drama to static shots.
source: Wex Photo Video

Motorsports photography is all about timing, precision, and creativity. With the right gear, camera settings, and composition techniques, you can capture breathtaking shots that convey the energy of the race.

Start practicing these tips at local races and track days, experiment with different angles and speeds, and soon you’ll be photographing motorsports like a pro!

The written content on this page was generated by ChatGPT.

How to Take Amazing Photos at Tennis Matches: A Guide to Fast Action Shots

Tennis is a game of speed, precision, and intense emotions, making it an exciting sport to photograph. Whether you’re capturing a powerful serve, a dramatic rally, or a player’s triumphant celebration, your goal is to freeze the most thrilling moments in time. However, fast-paced action, unpredictable movements, and varying lighting conditions can make tennis photography challenging. This guide will help you overcome these obstacles and take incredible action shots at tennis matches.

1. Use the Right Camera and Lens

Choosing the right equipment is crucial for capturing sharp and dynamic tennis photos. A camera with a fast autofocus system and a telephoto lens will allow you to get closer to the action without missing key moments.

Recommended Gear:

  • Camera: A DSLR or mirrorless camera with fast autofocus and burst mode (e.g., Canon EOS R6, Sony A7 IV, or Nikon Z9).
  • Lens: A telephoto lens (70-200mm f/2.8 or 300mm) for close-up action shots.
  • Memory Cards: High-speed SD or CFexpress cards to handle burst mode efficiently.

2. Optimize Your Camera Settings

Tennis is a fast-moving sport, so adjusting your camera settings correctly will help freeze motion and capture sharp shots. The right combination of shutter speed, aperture, and ISO can make a huge difference in your final images.

Best Camera Settings for Tennis Photography:

  • Shutter Speed: 1/1000s or faster to freeze motion.
  • Aperture: f/2.8 to f/5.6 for a blurred background (bokeh effect) while keeping the player in focus.
  • ISO: Start at ISO 400 (increase for low-light conditions like indoor matches or evening games).
  • Autofocus Mode: AI Servo (Canon) or AF-C (Nikon/Sony) for continuous tracking of moving players.
  • Burst Mode: Enable continuous shooting to capture multiple frames per second.

3. Position Yourself for the Best Angles

Where you stand greatly impacts the quality of your shots. Tennis courts offer multiple vantage points, each providing unique opportunities to capture different aspects of the game.

  • Baseline: Capture intense facial expressions and strong serves.
  • Sideline: Get dynamic shots of players sprinting and volleying.
  • Behind the Net: Focus on action near the net and mid-court battles.
  • Stands (High Angle): Capture wide shots showcasing the court and crowd energy.

4. Master Composition Techniques

A well-composed shot tells a story and draws viewers into the moment. Paying attention to composition elements will enhance the impact of your images.

Composition Tips:

  • Follow the Ball: Track the ball in your frame to capture peak-action shots.
  • Rule of Thirds: Position the player off-center for a balanced and engaging composition.
  • Frame Tight: Zoom in to highlight facial expressions and racket movements.
  • Include the Crowd: Adding audience reactions adds context and excitement.

5. Adjust for Indoor and Outdoor Matches

Lighting conditions vary between outdoor and indoor tennis, requiring adjustments to ensure well-exposed and sharp images.

Outdoor Tennis:

  • Use a polarizing filter to reduce glare on sunny days.
  • Adjust white balance based on sunlight conditions.

Indoor Tennis:

  • Increase ISO to accommodate lower light.
  • Use faster lenses (f/2.8 or lower) to allow more light.

6. Post-Processing for Stunning Final Images

After the match, editing your photos can enhance clarity and impact. A few simple adjustments can turn a good shot into an outstanding one.

Editing Tips:

  • Sharpen the subject: Use selective sharpening to highlight the player.
  • Crop effectively: Adjust framing for better composition.
  • Adjust contrast and exposure: Improve color balance and brightness.
  • Reduce noise: Especially for high ISO shots in low light.
source: Jack Beasley

Tennis photography requires skill, patience, and practice, but by using the right equipment, optimizing your camera settings, and applying smart composition techniques, you can capture amazing fast-action shots. Whether you’re photographing a local tournament or a professional match, these tips will help you take incredible sports photos that stand out.

Related Posts:

  • Best Camera Settings for Sports Photography
  • How to Capture Motion in Fast-Paced Sports
  • Essential Lenses for Action Photography

Are you ready to level up your tennis photography? Grab your camera and start shooting!

The written content on this page was generated by ChatGPT.

Best Techniques for Shooting Gymnastics: How to Photograph High-Flying Stunts

Gymnastics is a mesmerizing blend of strength, agility, and grace, making it one of the most exciting sports to capture through photography. Whether it’s a high-flying vault, a perfectly executed floor routine, or a gravity-defying dismount, each movement tells a story of dedication and skill. However, photographing gymnastics comes with its own set of challenges—fast motion, unpredictable lighting, and the need for split-second timing. Mastering this art requires not only technical knowledge but also an understanding of the sport itself.

In this guide, we’ll explore the best techniques to help you freeze time and capture stunning images of gymnasts in action.

1. Use the Right Camera and Lens

To freeze fast-moving gymnasts in action, invest in a camera with a fast shutter speed and excellent low-light performance. A DSLR or mirrorless camera with high ISO capabilities is ideal for indoor gymnastics events, where lighting is often dim. A good camera and lens combination will make a significant difference in the clarity and sharpness of your shots.

Recommended Gear:

  • Camera: Canon EOS R6, Nikon Z9, or Sony A7 IV
  • Lens: 70-200mm f/2.8 for close-ups, 24-70mm f/2.8 for wide-angle shots
  • Memory Cards: High-speed SD cards to handle continuous shooting

A telephoto lens is particularly useful when capturing action from a distance, allowing you to zoom in on individual athletes without sacrificing image quality. A wider lens can help in capturing full routines and environmental shots that include the apparatus and audience.

2. Optimize Your Camera Settings

Capturing gymnastics action requires fine-tuned settings to ensure sharp images. Gymnastics moves happen in an instant, so your camera must be set up for success before the action begins.

Best Settings:

  • Shutter Speed: 1/1000s or faster to freeze motion
  • Aperture: f/2.8 or f/4 for optimal light and subject separation
  • ISO: 800-3200 depending on lighting conditions
  • Autofocus Mode: Continuous autofocus (AI-Servo/AF-C) to track moving subjects
  • Drive Mode: High-speed burst mode to capture multiple frames per second

Using burst mode increases your chances of capturing the perfect shot at the peak of an athlete’s movement. Autofocus tracking will help keep the subject in sharp focus, even during rapid sequences.

3. Find the Best Shooting Angles

Great gymnastics photos often come down to finding the perfect angle. Your positioning plays a crucial role in the quality and impact of your shots.

  • Low-angle shots: Emphasize height and athleticism during jumps and flips.
  • Side perspectives: Showcase technique and body positioning.
  • Front-facing shots: Capture intense facial expressions and focus.
  • Overhead views: Provide a unique perspective, especially on the rings or parallel bars.

Experiment with different positions throughout the event to diversify your shots and tell a complete visual story. Shooting from a low angle makes flips and leaps look even more impressive, while side angles can showcase an athlete’s form and extension.

4. Master Timing and Anticipation

Since gymnastics routines follow a set sequence, studying the athlete’s routine beforehand can help you anticipate key moments. Understanding the movements will allow you to press the shutter at the exact moment when the action peaks.

Pay attention to peak action points, such as:

  • Tumbling sequences – Catch gymnasts mid-air during flips.
  • Dismounts – Capture their final pose and landing.
  • Handstands and holds – These provide an opportunity for sharp, well-composed images.

Anticipation is key in sports photography. If you wait until you see the perfect moment, it might already be too late to capture it. Pre-focus and be ready to shoot a burst of images to increase your chances of getting the perfect frame.

5. Utilize Proper Lighting Techniques

Gymnastics events are often held in indoor arenas with inconsistent lighting. Overcome these challenges by:

  • Using wide apertures (f/2.8) to let in more light.
  • Increasing ISO while balancing noise reduction.
  • Positioning yourself where the light source illuminates the gymnast’s face and body.
  • If allowed, using external flashes or strobes strategically.

A well-lit shot can make all the difference in capturing the fine details of an athlete’s movements, from facial expressions to the textures of their attire.

6. Edit for Maximum Impact

Post-processing can enhance your gymnastics photos and correct any exposure or noise issues. Even the best images can benefit from some fine-tuning.

Editing Tips:

  • Adjust exposure and contrast to enhance subject visibility.
  • Sharpen details to emphasize muscle definition and motion.
  • Crop strategically to remove distractions and focus on the athlete.
  • Reduce noise in high-ISO shots using Lightroom or Photoshop.

Editing should be subtle and should enhance the image rather than alter it drastically. The goal is to bring out the best aspects of the photograph while maintaining its authenticity.

7. Follow Competition Rules and Gym Policies

Some gymnastics venues have restrictions on photography, so always check guidelines beforehand. Avoid using flash during competitions, as it can distract athletes and affect performance.

It’s also important to be respectful of athletes, coaches, and event organizers. Being mindful of your surroundings and following event policies will ensure you can continue to photograph gymnastics without issues.

source: Wex Photo Video

Capturing gymnastics photography is both challenging and rewarding. By using the right gear, optimizing your settings, and anticipating key moments, you can take stunning photos that showcase the power and grace of gymnasts. Keep practicing, experiment with angles, and refine your post-processing skills to elevate your sports photography game.

The written content on this page was generated by ChatGPT.
Indoor vs. Outdoor Sports Photography: Challenges and Solutions

Sports photography is a thrilling and dynamic field that requires skill, patience, and an understanding of how to handle different environments. Whether capturing the fast-paced action of an indoor basketball game or the raw energy of a soccer match played under the open sky, photographers must adapt to the unique challenges each setting presents. In this article, we’ll break down the major differences between indoor and outdoor sports photography and provide actionable solutions to help you elevate your shots.

Lighting Conditions: Natural vs. Artificial Light

Challenges in Indoor Sports Photography

Indoor sports venues often have dim or uneven lighting, which can lead to motion blur, noise, and incorrect exposure. Many indoor arenas use artificial lights that cast harsh shadows or flicker, making it difficult to capture sharp, well-lit images.

Solutions for Indoor Photography

  • Increase ISO: Raising the ISO setting can help compensate for low light conditions, but be cautious of excessive noise. Modern cameras handle high ISO levels better, so experiment with your camera’s limits.
  • Use a Fast Lens: A lens with a wide aperture (f/2.8 or lower) allows more light into the camera sensor, improving image quality in darker conditions.
  • Adjust White Balance: Artificial lighting can create color casts. Manually adjusting white balance settings will help achieve accurate colors.
  • Use Flash Wisely: Some indoor venues prohibit flash photography. If permitted, use an external flash with a diffuser to soften the light and reduce harsh shadows.

Challenges in Outdoor Sports Photography

Outdoor sports rely on natural lighting, which varies based on the time of day and weather conditions. Bright sunlight can cause overexposure and harsh shadows, while cloudy days may lead to dull, flat images.

Solutions for Outdoor Photography

  • Shoot During Golden Hours: Early morning and late afternoon provide softer, more even lighting for outdoor sports.
  • Use a Polarizing Filter: A polarizing filter helps reduce glare and enhances colors, particularly for water or snow-based sports.
  • Adjust Exposure Settings: Be ready to tweak shutter speed, aperture, and ISO based on changing light conditions.
  • Watch for Shadows: Position yourself strategically to avoid unwanted shadows interfering with your composition.

Motion and Action: Capturing the Perfect Shot

Challenges in Indoor Sports

Since indoor sports often take place in confined spaces, movement is rapid and unpredictable. Slow shutter speeds can result in motion blur, making it difficult to capture sharp, detailed action shots.

Solutions for Indoor Photography

  • Increase Shutter Speed: A fast shutter speed (1/500s or higher) helps freeze action effectively.
  • Use Continuous Autofocus (AI-Servo): This mode keeps moving subjects sharp and in focus.
  • Burst Mode: Shooting in burst mode ensures you capture the peak action moment.

Challenges in Outdoor Sports

Outdoor sports involve larger playing areas, requiring photographers to track fast-moving subjects across different distances. Weather elements like wind, rain, or dust can further complicate outdoor shoots.

Solutions for Outdoor Photography

  • Use a Telephoto Lens: A 70-200mm or 100-400mm lens allows you to capture distant action with clarity.
  • Anticipate Movement: Learn the game’s flow to predict key moments.
  • Protect Your Gear: Use lens hoods and weather-sealed cameras to shield equipment from outdoor elements.

Composition and Background Control

Indoor Photography Considerations

  • Avoid Cluttered Backgrounds: Indoor arenas may have distracting backgrounds, such as audience members, banners, or advertisements. Using a wider aperture (lower f-stop) can help blur the background.
  • Utilize Leading Lines: Use court markings and other structural elements to guide the viewer’s eye toward the subject.

Outdoor Photography Considerations

  • Leverage Natural Backgrounds: Outdoor environments offer varied backdrops like trees, stadiums, and landscapes. Position yourself to make the most of these elements.
  • Use Low Angles: Shooting from a low angle adds drama and intensity to action shots.
source: Michael The Maven

Both indoor and outdoor sports photography come with their own set of challenges, but with the right techniques and equipment, you can consistently capture stunning images. Understanding lighting, motion control, and composition will give you an edge, regardless of the setting. Keep practicing, stay adaptable, and always be ready to capture the defining moment of the game.

By implementing these solutions, you’ll be well-equipped to handle any sports photography scenario, making your work stand out in a competitive field.

The written content on this page was generated by ChatGPT.

Photographing Track and Field Events: Best Angles and Timing

Track and field photography is an exciting challenge that requires a keen eye, quick reflexes, and a deep understanding of the sport. Capturing the raw power, speed, and emotion of athletes in motion can produce some of the most compelling sports images. Whether you are shooting a high school meet or an international championship, knowing the best angles and timing will elevate your shots and make them stand out.

Understanding the Sport

Before you start shooting, it is crucial to understand the structure of track and field events. The sport is divided into running events (sprints, middle-distance, and long-distance races), jumping events (long jump, high jump, triple jump, and pole vault), and throwing events (shot put, discus, javelin, and hammer throw). Each discipline requires a different photographic approach to capture the peak moments effectively.

Familiarizing yourself with event schedules and heat timings can also give you an advantage. Knowing when and where an event will take place allows you to scout the best locations for capturing action-packed images. Studying past performances and understanding how athletes prepare before their event can help you anticipate the right moments to shoot.

Best Angles for Capturing Track and Field Events

1. Sprints and Races

  • Head-On Shots: Position yourself at the finish line to capture the intensity on athletes’ faces as they push to the end.
  • Side Angles: Shooting from the side, slightly ahead of the runners, gives a dynamic sense of movement and speed.
  • Low Angles: Getting lower to the ground can emphasize the power and stride of the athletes, making them appear larger than life.

Timing is crucial when shooting sprinting events. The best moment to press the shutter is when an athlete reaches their maximum stride, with their muscles fully engaged and determination written on their face. You should also be prepared for reaction shots after the race, as emotions run high at the finish line.

2. Hurdles and Steeplechase

  • Mid-Air Action: The best moment to capture is when the athlete is at the peak of their jump over the hurdle. Position yourself at a slight angle to get depth and motion.
  • Landing Shots: Just as they touch down, you can capture dirt and water splashes (in steeplechase) to enhance the sense of action.

Shooting hurdles and steeplechase requires impeccable timing. The peak of the action happens in fractions of a second, so using burst mode can help capture multiple frames and increase your chances of getting a perfect shot.

3. Long Jump and Triple Jump

  • Takeoff and Mid-Air: Position yourself at an angle near the takeoff board to capture the athlete’s power as they leap.
  • Sand Pit Landing: A great shot is when the athlete lands in the sand, kicking up dust. Shooting from a lower angle enhances the drama.

With long jump and triple jump, capturing the athlete’s facial expressions is just as important as getting their form right. A well-timed shot can showcase determination, focus, and sometimes even surprise if the athlete misjudges the jump.

4. High Jump and Pole Vault

  • Side View at the Bar: For high jump, a side angle capturing the athlete arching over the bar is ideal.
  • Pole Vault Peak Height: Position yourself near the landing mat to capture the athlete clearing the highest point.

For high jump and pole vault, the split second when the athlete is completely airborne is the key moment. Keeping your camera on continuous focus will ensure that you don’t miss this peak moment. The expressions of sheer concentration and effort make for striking images.

5. Throwing Events (Shot Put, Discus, Javelin, Hammer Throw)

  • Release Point: The most dramatic moment is when the athlete releases the implement. Standing at a 45-degree angle provides a dynamic perspective.
  • Expression Shots: Faces of athletes during throws are full of intensity, making for compelling portrait shots.

Throwing events often involve rotational movements, so finding an angle that captures the full range of motion can add depth to your shots. The release point, when the implement is at its highest velocity, is the most action-packed moment to capture.

Perfect Timing for the Best Shots

1. Anticipate the Action

Understanding an athlete’s movement pattern will help you press the shutter at the perfect moment. For example, sprinters have a distinctive acceleration phase before reaching top speed. Anticipate these key moments for maximum impact.

2. Use Burst Mode

Sports photography requires shooting multiple frames per second to ensure you capture the peak action. Use burst mode to increase your chances of getting the perfect shot.

3. Track Focus and Autofocus Settings

Use continuous autofocus (AI-Servo for Canon, AF-C for Nikon and Sony) to keep moving subjects sharp. Tracking focus is particularly useful for runners and jumpers in motion.

4. Frame with Purpose

Composition is key to creating compelling images. Utilize the rule of thirds by placing the subject off-center for a balanced and aesthetically pleasing shot.

Additional Tips for Standout Photos

  • Use a Fast Shutter Speed: A shutter speed of at least 1/1000s is recommended to freeze motion without blur.
  • Adjust ISO According to Light Conditions: If shooting under stadium lights, increase your ISO to maintain a fast shutter speed.
  • Experiment with Depth of Field: A wide aperture (f/2.8 – f/5.6) isolates the subject from the background, making them stand out.
  • Capture Emotion and Storytelling: Don’t just focus on the action—reactions, celebrations, and even moments of exhaustion tell powerful stories.
source: Fatal Onion

Photographing track and field events requires a combination of technical skill, an understanding of the sport, and a creative eye. By positioning yourself strategically, anticipating key moments, and using the right camera settings, you can capture breathtaking images that showcase the energy and emotion of these competitions. Whether you’re a beginner or a seasoned photographer, applying these techniques will help you create dynamic and impactful sports photography that truly stands out.

Beyond the technical aspects, always be mindful of the atmosphere and the unique stories unfolding before you. Track and field meets bring together a diverse range of athletes, each with their own journey, challenges, and triumphs. By staying observant and adapting to the ever-changing moments, you’ll be able to craft images that not only document the competition but also celebrate the passion and dedication of the athletes.

The written content on this page was generated by ChatGPT.