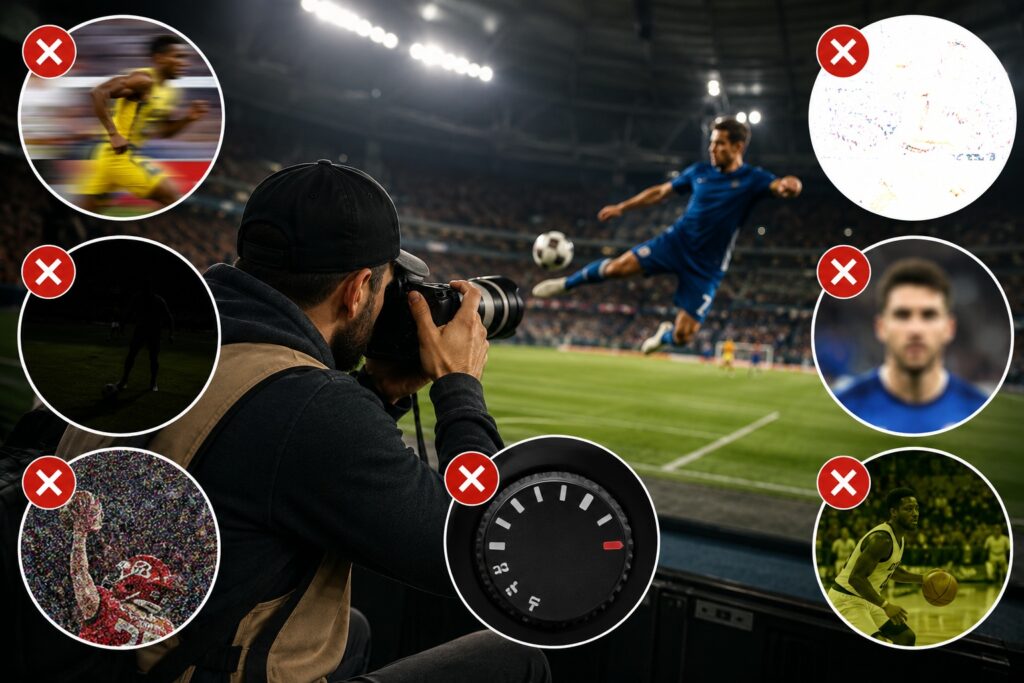
A missed shot in sports photography can happen in a fraction of a second. One moment, an athlete is sprinting toward the finish line; the next, the winning moment has passed. Your camera might be capable of capturing an incredible image, but if the focus mode is wrong, the shutter speed is too slow, or the memory card is nearly full, you could miss the action entirely.
Preparing your camera before a sporting event gives you a better chance of capturing sharp, well-exposed photographs when the action unfolds. Whether you’re photographing a local soccer match, a school basketball tournament, a professional football game, or a track and field competition, having a reliable sports photography camera settings checklist can help you work more confidently.
The challenge is that no single camera configuration works perfectly for every sport. A fast-moving cyclist in bright daylight presents different challenges from a basketball player jumping toward the hoop in a dimly lit gym. Even conditions at the same venue can change throughout the day, requiring adjustments to exposure, autofocus, and other settings.
Rather than relying on guesswork once the game begins, establish a repeatable pre-event routine. This guide explains the essential camera settings to check before every sporting event, how to adjust them for different environments, and which equipment checks can help prevent avoidable problems.

Why You Should Check Your Camera Settings Before a Sports Event
Sports photography requires quick reactions, accurate focusing, and the ability to anticipate movement. Unlike a landscape or still-life subject, an athlete rarely waits for you to adjust your camera. A fast break, a diving save, or a dramatic finish might happen only once.
Checking your settings before the event helps you identify potential problems while you still have time to correct them. You can confirm that your camera is using an appropriate shutter speed, test autofocus tracking, check the remaining memory card capacity, and make sure your batteries can last through the session.
A pre-event check also reduces the number of decisions you need to make during the game. When your basic settings are ready, you can concentrate on composition, timing, player positioning, and the story unfolding in front of you.
This preparation is particularly valuable for beginners. Instead of changing several settings at once whenever a photograph looks wrong, you can begin with a dependable setup and make deliberate adjustments as the lighting and action change.
1. Set the Right Shutter Speed for Sports Photography
Shutter speed is one of the most important camera settings for capturing sports action. It determines how long the camera sensor is exposed to light and plays a major role in how movement appears in the final photograph.
A shutter speed that is too slow can produce unwanted motion blur, especially when athletes are running, jumping, throwing, or making sudden changes in direction. A faster shutter speed helps freeze these movements, although it allows less light into the camera.
Before the event begins, consider how quickly the athletes will move and how much motion you want to preserve.
Recommended starting shutter speeds
- Fast-running sports: Start around 1/1000 to 1/2000 second for sharp action.
- Football and soccer: Try 1/1000 second or faster for tackles, sprints, and shots on goal.
- Basketball and volleyball: Start around 1/800 to 1/1600 second to freeze jumps and quick movements.
- Baseball and tennis: Consider 1/1000 to 1/2000 second for pitching, serves, and ball contact.
- Track and field: Try 1/1000 to 1/2000 second for running and jumping events.
- Slower sports or wider environmental shots: Speeds around 1/500 second may be sufficient for some moments.
- Creative panning photographs: Experiment with 1/30 to 1/250 second, depending on the athlete’s speed and your intended effect.
These values are starting points, not strict rules. The shutter speed needed to freeze a particular movement depends on the subject’s speed, direction, distance, focal length, and the amount of motion visible in the frame.
For example, a runner moving sideways across your frame may require a faster shutter speed than an athlete moving directly toward you. A tight shot taken with a long telephoto lens can also make small movements more noticeable.
Before the competition starts, take a few test photographs of moving subjects if possible. Review the results at a magnified view to see whether the athlete’s face, eyes, and important details are sharp.
Checklist: Confirm that your shutter speed is fast enough for the sport, lighting, and type of action you expect to photograph.
2. Choose an Appropriate Aperture
Aperture controls how much light enters through the lens. It also affects depth of field, which determines how much of the scene appears acceptably sharp.
For sports photography, a wide aperture is often helpful because it lets you use faster shutter speeds in challenging lighting conditions. It can also separate an athlete from a distracting background, making the subject stand out.
Common starting apertures include f/2.8, f/3.5, f/4, and f/5.6, depending on the lens and shooting conditions.
A lens with a maximum aperture of f/2.8 is useful for indoor sports or evening games because it can gather more light than a lens limited to f/5.6. However, wide apertures create a shallower depth of field, which means focus accuracy becomes especially important.
If you’re photographing a single athlete against a distant background, f/2.8 or f/4 may create an attractive result. If several players are moving together and you want more of them in focus, consider f/4 or f/5.6 when sufficient light is available.
Your distance from the subject also affects depth of field. A tightly framed athlete photographed with a telephoto lens may have less of the scene in focus than a wider shot taken from farther away.
Avoid choosing an aperture simply because it produces the strongest background blur. The priority in action photography is capturing the important subject sharply while maintaining enough exposure to freeze movement.
Checklist: Choose an aperture that balances available light, shutter speed, and the amount of the scene you want in focus.
3. Check Your ISO Settings Before the Action Starts
ISO determines how sensitive the camera’s imaging system is configured to be when recording a photograph. Raising ISO allows you to use faster shutter speeds in low light, but it can introduce more visible image noise and reduce fine detail, depending on the camera.
The best ISO setting depends on the available light, your chosen aperture, and the shutter speed needed to freeze the action.
In bright outdoor conditions, ISO 100 or 200 may be sufficient. Under cloudy skies, ISO 400 to 800 may be more practical. Indoor tournaments, evening matches, and poorly lit venues may require ISO 1600, 3200, or higher.
Modern cameras vary considerably in their high-ISO performance, so there is no universal maximum ISO that guarantees good results.
For sports photography, a slightly noisy but sharp photograph is often more useful than a clean-looking image ruined by motion blur. Do not be afraid to raise ISO when necessary to maintain an appropriate shutter speed.
If you’re using Auto ISO, establish a reasonable maximum for your camera and set a minimum shutter speed if your camera supports that feature. Be aware that the minimum shutter speed behavior varies by camera model and exposure mode.
Check your exposure after taking a few test shots. If the images are too dark, determine whether increasing ISO, opening the aperture, or adjusting the shutter speed is the best solution.
Checklist: Confirm that ISO is appropriate for the lighting and that the camera can maintain the shutter speed you need.
4. Select the Best Autofocus Mode for Moving Athletes
Autofocus settings can make a major difference in sports photography. Athletes rarely remain in one position, so focusing once and expecting the subject to stay sharp is usually not enough.
For most sports action, use continuous autofocus. Depending on your camera brand, this may be called AF-C, AI Servo AF, or Continuous AF.
This mode continually adjusts focus as the subject moves, helping the camera maintain focus while you track athletes through the frame.
Choose the right autofocus area
Many cameras offer several autofocus area options, including single-point autofocus, expanded or dynamic areas, tracking zones, and automatic subject detection.
Each option has advantages:
- Single-point autofocus: Useful when you want precise control over the focus point, such as photographing a player in a predictable position.
- Expanded or dynamic autofocus areas: Help maintain focus when the subject moves slightly away from your selected point.
- Zone autofocus: Useful when an athlete moves unpredictably within a defined portion of the frame.
- Subject tracking: Can follow a selected athlete across the frame when supported by your camera.
- Eye detection: Can help maintain focus on an athlete’s eye or face when the camera supports reliable human-subject detection.
Automatic subject detection can be extremely helpful, but it is not infallible. During a crowded play, the camera may focus on a nearby player instead of your intended subject. Practice switching between tracking options so you can respond when the camera selects the wrong athlete.
Before the event, test your autofocus by following a moving person or another suitable subject. Check whether focus remains on the intended target as it approaches, moves across, or recedes from the camera.
Checklist: Set continuous autofocus and select an autofocus area that suits the sport and your shooting position.
5. Enable Burst Mode for Important Moments
Burst mode, also known as continuous shooting, allows the camera to capture multiple photographs while you hold down the shutter button.
This feature is particularly useful when timing is difficult. A basketball player may release the ball, a goalkeeper may dive, or a sprinter may cross the finish line in a fraction of a second. A short burst can give you several frames from which to select the sharpest and most expressive moment.
However, the fastest available frame rate is not always necessary. High-speed bursts can fill the camera buffer, consume storage space, and leave you with hundreds of nearly identical photographs to review.
Choose a continuous shooting speed that fits the event. A moderate burst rate may be enough for general play, while a higher rate can be useful when photographing brief moments such as a tennis serve or a finish-line crossing.
Also check whether your camera maintains autofocus and exposure adjustments during continuous shooting. Some models perform differently depending on the selected drive mode, file format, and shutter type.
Use short, deliberate bursts rather than holding the shutter button continuously throughout the game. This approach saves storage, reduces sorting time, and encourages you to anticipate the action instead of reacting to everything.
Checklist: Confirm the drive mode, test continuous autofocus during bursts, and make sure your memory card can handle the camera’s shooting speed.
6. Choose the Correct Exposure Mode
Your camera’s exposure mode determines how shutter speed, aperture, and ISO are selected.
For sports photography, Shutter Priority and Manual mode with Auto ISO are two useful options. The best choice depends on your experience, the camera you use, and how much the lighting changes during the event.
Shutter Priority mode
In Shutter Priority mode, you select the shutter speed while the camera chooses an aperture. This can be convenient when the main objective is freezing motion.
For example, you might select 1/1000 second for an outdoor soccer match and let the camera adjust the aperture as the lighting changes.
The limitation is that the lens may reach its maximum aperture in dim conditions. If that happens, the photograph can still be underexposed unless the camera can increase ISO or you adjust the settings.
Manual mode with Auto ISO
Manual exposure with Auto ISO allows you to control both shutter speed and aperture while the camera adjusts ISO to maintain exposure.
This approach is especially useful when the lighting is reasonably consistent but the backgrounds change from bright grass to dark stands. It can help keep exposure more consistent across a sequence of photographs.
However, Auto ISO cannot compensate indefinitely. If the camera reaches its ISO limit or the lens cannot gather enough light, the exposure may still be too dark.
When to use full Manual mode
Full Manual mode, with ISO set manually, is useful when you have consistent lighting and want precise control over exposure. It may work well for indoor courts with steady lighting or for a particular position on a field.
When sunlight moves behind clouds or athletes move between bright and shaded areas, you may need to monitor exposure and adjust settings more frequently.
Checklist: Select an exposure mode you can manage confidently and understand how it responds when the light changes.
7. Check White Balance for Accurate Colors
White balance affects how your camera renders colors under different lighting conditions.
Outdoor daylight, fluorescent lights, and LED fixtures can produce different color casts. Indoor sports venues are particularly challenging because artificial lighting may make white uniforms appear yellow, green, or blue.
Automatic White Balance is a convenient starting point for many sporting events, especially when the lighting changes between different areas of a venue.
If the lighting remains consistent, a suitable preset or custom white balance can help maintain more uniform color across a series of images. Some venues use lighting that flickers or changes color during the camera’s exposure, so even a fixed white balance may not eliminate every variation.
Photographing in RAW gives you greater flexibility to correct white balance during editing. JPEG files can also be adjusted, but they offer less latitude for extensive corrections.
Pay attention to white jerseys, skin tones, and other familiar colors when reviewing test shots. They can help you identify a strong color cast before the event gets underway.
Checklist: Select Auto White Balance or a suitable preset, and consider RAW capture if you want greater flexibility during post-processing.
8. Select the Right Metering Mode and Check Exposure
Metering determines how your camera evaluates the light in a scene when calculating exposure.
Evaluative or matrix metering works well as a general-purpose option for many sporting events. It considers different areas of the frame to estimate an appropriate exposure.
Center-weighted or spot metering can be useful in specific situations, such as photographing an athlete against a very bright background. However, these modes require more care because the selected area may not represent the entire scene.
Sports photographers frequently encounter difficult exposure conditions. A white uniform against dark stands, a backlit runner, or an athlete moving from sunlight into shade can confuse automatic exposure systems.
Take a few test photographs and inspect both the image and the histogram if your camera provides one. Look for clipped highlights on bright jerseys and faces, as well as shadows that have become too dark to retain useful detail.
Exposure compensation can help when using an automatic exposure mode. For example, a camera may darken a scene dominated by bright snow or a white playing surface, so positive exposure compensation may be needed. The correct adjustment depends on the scene and your camera’s metering behavior.
Avoid relying exclusively on the rear screen, because its brightness may not accurately reflect the final exposure.
Checklist: Choose a suitable metering mode, inspect test images, and confirm that important highlights and shadows retain detail.
9. Decide Whether to Shoot in RAW or JPEG
File format affects image quality, storage requirements, and the speed of your workflow.
RAW files preserve more image data for editing, giving you greater flexibility to recover some highlight and shadow detail, adjust white balance, and fine-tune exposure. This can be particularly valuable when venue lighting is difficult.
JPEG files are processed in-camera and are generally smaller. They can be useful when you need to transfer images quickly, conserve storage, or deliver photographs without extensive editing.
Some cameras also offer HEIF or RAW-plus-JPEG options, depending on the model.
If you’re photographing a personal project or learning sports photography, RAW is a strong choice when you have enough storage and time for editing. For events that require rapid delivery, JPEG may be more practical, particularly if your camera’s color and picture settings are already configured.
RAW files can also increase buffer pressure during continuous shooting, depending on your camera and memory card. Test your chosen format before an important event rather than discovering performance limitations during a decisive play.
Checklist: Choose RAW, JPEG, or a combination based on your editing needs, delivery deadlines, and camera performance.
10. Configure Anti-Flicker and Shutter Settings for Indoor Sports
Indoor sports venues often use artificial lighting that can flicker rapidly. This can create inconsistent brightness or color between consecutive frames, particularly when shooting at high shutter speeds.
Some cameras offer an anti-flicker shooting feature that detects the lighting cycle and adjusts the timing of each exposure. Certain newer cameras also offer high-frequency flicker reduction, which may help with LED lighting under specific conditions.
If your camera has these options, test them under the actual venue lights. They may improve consistency, although results depend on the lighting system and camera model.
Electronic shutters can introduce additional challenges. Depending on the sensor’s readout speed and the lighting, they may produce banding, uneven exposure, or distortion in fast-moving subjects.
A mechanical shutter or an appropriate electronic-first-curtain mode may be a better choice in some situations. However, mechanical shutters also have flash synchronization limits, so consider the full shooting conditions before selecting a shutter type.
Checklist: Test anti-flicker settings and shutter type when photographing indoor sports or venues with problematic LED lighting.
11. Check Image Stabilization and Camera Support
Image stabilization can reduce blur caused by small camera movements, particularly when you’re using a long telephoto lens.
Lens-based stabilization may be labeled IS, VR, OSS, or another manufacturer-specific term. In-body image stabilization is also available in many cameras.
Stabilization is helpful when photographing athletes with slower shutter speeds, shooting from a stationary position, or using panning techniques with a compatible stabilization mode.
However, stabilization does not freeze the movement of an athlete. If your subject is moving quickly, you still need a sufficiently fast shutter speed.
Some lenses and cameras can automatically detect panning, while others provide dedicated stabilization modes. Check the instructions for your equipment before relying on a particular setting.
If you’re using a monopod, confirm that the lens and stabilization system work well with it. A monopod can reduce fatigue and improve support when using heavy telephoto equipment, but it does not eliminate all camera movement.
Checklist: Confirm stabilization settings, test any panning mode, and make sure your camera support is secure and comfortable.
12. Format and Check Your Memory Cards
A camera with the perfect settings is of little use if the memory card is full, damaged, or too slow for continuous shooting.
Before every event, check the remaining storage and confirm that the card is compatible with your camera. High-resolution RAW files and fast bursts can consume considerable space, particularly during long tournaments.
Use a reputable card with sufficient write speed for your camera’s burst rate and video requirements. The speed printed on a card does not always represent its sustained performance in every mode, so check the manufacturer’s recommendations.
Format the card in the camera before the event when the images have already been safely backed up and you no longer need the existing files. Formatting erases the card, so never do this before verifying that important photographs have been transferred elsewhere.
If your camera has two card slots, consider using a backup configuration when appropriate. Depending on the camera, you may be able to record the same photographs to both cards for additional protection.
Bring spare cards in a protective case and keep used cards separate from empty ones.
Checklist: Verify available capacity, confirm card compatibility, and carry enough backup storage for the expected number of photographs.
13. Check Battery Levels and Power-Saving Settings
Sports events can last for several hours, and continuous autofocus, image stabilization, high-speed bursts, and image review can consume battery power.
Charge your batteries before leaving for the venue. Bring at least one spare battery if possible, especially for full-day events, tournaments, or cold-weather photography.
Check your camera’s battery indicator and consider how quickly power is being consumed during test shooting. A battery that appears nearly full may not last as long when using demanding autofocus and burst settings.
Power-saving features can help extend battery life, but avoid settings that interfere with your ability to capture action. For example, an overly aggressive sleep setting may interrupt your workflow between plays.
If you use a battery grip, confirm that the batteries are installed correctly and that the grip is secure.
Checklist: Start with fully charged batteries, pack spares, and confirm that power-saving settings won’t slow you down at important moments.
14. Set Up Back-Button Focus and Custom Controls
Some sports photographers assign autofocus activation to a button on the back of the camera rather than relying entirely on the shutter button. This technique is commonly called back-button focus.
It allows you to separate focusing from taking a photograph. Depending on the camera and how you configure it, you can maintain focus tracking with one button and release the shutter with another.
Back-button focus can be useful when you want to switch between continuous tracking and holding focus on a predictable area. However, it is not automatically better for everyone. If you’re new to sports photography, the default shutter-button autofocus system may be easier to manage.
Custom buttons can also provide quick access to autofocus area selection, subject detection, ISO, drive mode, or exposure compensation.
Before the event, identify the settings you change most frequently and assign them to accessible controls if your camera supports customization.
Practice using these controls without taking your eye away from the viewfinder. Familiarity matters more than copying another photographer’s setup.
Checklist: Confirm your autofocus controls, customize frequently used functions if helpful, and practice switching settings before the game begins.
15. Prepare Your Camera for the Venue and Sport
Even after checking the core settings, consider how the location will affect your photography.
Outdoor events may involve bright sunshine, changing clouds, rain, dust, or deep shadows. Indoor events can feature low light, restricted shooting positions, mixed color temperatures, and flickering lights.
Think about the action you expect to photograph and prepare a suitable starting configuration.
Outdoor sports
For outdoor soccer, football, cycling, and track events, start with a shutter speed fast enough to freeze the anticipated movement. Use a suitable aperture, then adjust ISO to achieve the correct exposure.
Pay attention to backlighting and changing weather. If the sun moves behind clouds, your camera may need a higher ISO to maintain the same shutter speed.
Indoor sports
Basketball, volleyball, gymnastics, and wrestling often take place under challenging artificial lighting. A wide-aperture lens can help, but you may still need a higher ISO to maintain a fast shutter speed.
Test the camera under the venue’s actual lights. Check for color casts, flickering, and exposure variations before the event begins.
Night games
Night sports photography requires balancing fast shutter speeds with limited available light. If flash is prohibited or impractical, a wide-aperture lens and a camera that performs well at higher ISO settings can be especially useful.
Check whether the venue has restrictions on camera equipment or shooting positions, and avoid using flash if it is prohibited or could distract athletes.
Sports with unpredictable movement
For sports involving rapid direction changes, such as basketball, soccer, and hockey, continuous autofocus and a responsive burst mode are useful starting points.
For predictable action, such as a runner passing a designated point, pre-focusing on the expected area may sometimes help. You can also anticipate the moment and prepare your composition before the athlete enters the frame.
Checklist: Adapt your settings to the lighting, sport, venue restrictions, and expected direction of movement.
16. Take Test Shots and Review Them Before the Event
One of the easiest ways to avoid technical problems is to take a few test photographs before the competition begins.
Photograph a moving person, an athlete warming up, or another suitable subject. Test the shutter speed, autofocus tracking, burst mode, and exposure under the same conditions you’ll face during the event.
Review the photographs at full magnification when possible. Check the subject’s eyes or face, look for motion blur, and determine whether the camera is consistently focusing on the intended person.
Pay attention to the background, too. A technically sharp photograph may still be distracting if a pole appears to grow out of an athlete’s head or if bright objects compete for attention.
If the images are blurry, determine whether the cause is subject movement, camera shake, or missed focus. Each problem requires a different solution.
If the photographs are too dark, check whether the camera has reached the lens’s maximum aperture or the Auto ISO limit. If colors appear strange, inspect white balance and venue lighting.
Make one adjustment at a time when possible. This makes it easier to understand which change improves the result.
Checklist: Take several test shots, inspect focus and exposure, and correct problems before the action becomes difficult to predict.
17. Don’t Forget Composition and Shooting Position
Camera settings help you capture a technically successful photograph, but composition determines how effectively the image tells a story.
Before the event starts, consider where you can safely and legally stand, what background will appear behind the athletes, and where the most important action is likely to occur.
If permitted, choose a position that gives you a clear view of the action without interfering with athletes, officials, spectators, or event staff. Follow all venue rules and never enter restricted areas to obtain a photograph.
Leave space in front of a moving athlete when the composition benefits from showing the direction of travel. This creates a sense of anticipation and prevents the subject from appearing cramped against the edge of the frame.
Look for expressions, interactions, celebrations, and moments of concentration rather than photographing only the ball or the fastest movement. Images of a coach giving instructions, teammates celebrating, or an athlete recovering after a difficult effort can add variety to a sports photography collection.
If you’re using a telephoto lens, be mindful of how much of the environment you’re excluding. Wider shots can communicate the scale of the event, while close-ups emphasize emotion and physical effort.
Checklist: Plan your shooting position, assess the background, and consider which moments will best communicate the story of the event.
Complete Sports Photography Camera Settings Checklist
Use this quick checklist before every game, match, race, or tournament. You can save it on your phone or keep a printed copy in your camera bag.
Camera settings
- Set an appropriate shutter speed for the sport.
- Choose an aperture that balances light and depth of field.
- Set ISO manually or configure Auto ISO appropriately.
- Enable continuous autofocus for moving athletes.
- Choose a suitable autofocus area or subject-tracking mode.
- Enable continuous shooting or burst mode.
- Select an exposure mode you can manage confidently.
- Check white balance.
- Confirm metering mode and exposure compensation.
- Choose RAW, JPEG, or another suitable file format.
- Test anti-flicker features and shutter type for indoor venues.
- Check image stabilization settings.
- Confirm custom buttons and autofocus controls.
Equipment and storage
- Charge the camera battery.
- Pack spare batteries.
- Check memory card capacity and compatibility.
- Bring spare memory cards.
- Clean the lens and check the front element.
- Confirm that the lens is securely attached.
- Check the camera strap, monopod, or other support.
- Pack a lens cloth and suitable weather protection.
- Confirm any venue restrictions on equipment.
Final checks
- Take test photographs under the available lighting.
- Inspect focus at full magnification.
- Check exposure and highlight detail.
- Confirm that burst shooting performs as expected.
- Verify that the camera is saving files correctly.
- Identify a safe shooting position.
- Review the expected action and lighting conditions.
Common Camera Setup Mistakes to Avoid Before a Sporting Event
Even experienced photographers can overlook small details when preparing for a competition. A few common mistakes are worth checking before the action begins.
Using a shutter speed that’s too slow
A slow shutter speed can create unwanted blur when athletes move quickly. Review your settings when switching from slower action to sprints, jumps, tackles, or other explosive movements.
Leaving autofocus in single-shot mode
Single-shot autofocus can be useful for stationary subjects, but continuous autofocus is usually a better starting point for athletes who move unpredictably.
Relying on Auto ISO without checking its limits
Auto ISO can simplify exposure, but it cannot always compensate for poor lighting. If the camera reaches its ISO limit, the shutter speed or exposure may no longer be suitable.
Forgetting about artificial lighting
Indoor lights can create color and exposure inconsistencies. Test your camera before the event and use anti-flicker features if they are available and effective in the venue.
Shooting too many unnecessary bursts
Continuous shooting increases your chances of capturing a decisive moment, but excessive bursts fill memory cards and make reviewing photographs more time-consuming. Anticipate the action and use short bursts when appropriate.
Making major changes without testing them
Changing autofocus areas, exposure modes, or custom buttons immediately before the game can create confusion. Test your setup first and keep a familiar configuration available.
Ignoring venue rules
Some venues restrict flash, tripods, monopods, large lenses, or particular shooting locations. Confirm the rules before arriving so you can prepare appropriate equipment.
Final Thoughts: Build a Repeatable Sports Photography Routine
Capturing great sports photographs begins before the first whistle, starting gun, or opening serve. A consistent camera settings checklist helps you prepare for fast movement, challenging lighting, and the unpredictable moments that make sports photography exciting.
Focus on the fundamentals first: a suitable shutter speed, reliable continuous autofocus, an appropriate aperture, well-managed ISO, and a drive mode that can keep up with the action. Then check exposure, white balance, memory cards, batteries, and the other details that support a smooth shooting session.
Remember that the best camera settings depend on the sport, venue, lighting, equipment, and moment you’re trying to capture. Use recommended values as starting points rather than fixed rules, and test your setup before the competition gets underway.
As you gain experience, your pre-event routine will become quicker and more intuitive. You’ll spend less time troubleshooting technical problems and more time anticipating decisive moments, recognizing expressive gestures, and composing photographs that communicate the energy of the game.
A reliable checklist cannot guarantee a perfect photograph, but it can eliminate many preventable mistakes. Prepare carefully, stay alert, and be ready when the action unfolds.
The written content on this page was generated by ChatGPT.