How to Photograph Athletes Coming Straight Toward the Camera

Photographing an athlete moving directly toward your camera is one of the best ways to create an image that feels immediate and powerful. A runner charging down a track, a soccer player sprinting toward goal, a cyclist approaching the finish line, or a basketball player driving toward the basket can all produce compelling photographs when you get the timing and focus right.

It is also one of the situations that can expose weaknesses in your camera technique. Unlike a subject standing still, an athlete running toward you is constantly changing distance. Your camera has to keep adjusting focus while you maintain composition, anticipate the peak moment, and use a shutter speed fast enough to freeze the action.

The good news is that you don’t need complicated equipment or advanced techniques to get started. The key is understanding how continuous autofocus, shutter speed, autofocus tracking, lens choice, positioning, and timing work together.

This guide explains how to photograph athletes coming toward the camera and how to consistently produce sharp, dynamic sports photos.

How to Photograph Athletes Coming Straight Toward the Camera
image generated using Google Gemini AI

Why Photographing Athletes Coming Toward You Is Challenging

When an athlete moves directly toward the camera, the distance between the subject and the lens changes rapidly.

That creates a different focusing challenge from photographing an athlete moving across the frame. With side-to-side movement, the subject can remain at roughly the same distance from the camera. With forward movement, however, the focus distance is constantly changing.

For example, imagine photographing a sprinter who begins 50 meters away and runs directly toward you. At the beginning of the sequence, the camera may focus at a relatively distant point. A few seconds later, the athlete may be only 15 meters away.

Your autofocus system needs to continually adjust to that changing distance.

This is why continuous autofocus is particularly important for sports photography. AF-C on many cameras, or AI Servo on Canon cameras, continuously adjusts focus as the subject moves.

At the same time, you need to keep the athlete inside your selected autofocus area. If the athlete moves outside that area or another player crosses between you and your subject, the camera may lose the intended subject.

The technique is therefore a combination of camera settings and photographer timing.


Start With a Fast Shutter Speed

The first setting to consider is shutter speed.

If your goal is to capture a sharp athlete moving toward you, start around 1/1000 second. For particularly fast action, increasing the shutter speed to 1/1600, 1/2000, or faster can provide additional protection against motion blur. Sports photography guides commonly recommend around 1/1000 second or faster for freezing running and other fast action.

A useful starting point is:

  • 1/500 sec: Slower action or situations where some motion blur is acceptable
  • 1/800 sec: Moderate action
  • 1/1000 sec: Good starting point for many sports
  • 1/1600 sec: Faster running and energetic movement
  • 1/2000 sec: Very fast action or when you want particularly crisp details
  • 1/4000 sec: Extremely fast movement or bright outdoor conditions

These aren’t strict rules. The appropriate shutter speed depends on the sport, the athlete’s speed, your focal length, distance from the athlete, and the direction of movement.

Interestingly, an athlete moving directly toward you can produce less apparent motion blur than an athlete moving rapidly across the frame. However, a fast shutter is still valuable because athletes don’t move perfectly straight. Arms, legs, equipment, and sudden changes in direction can introduce additional movement.


Use Continuous Autofocus

If there is one autofocus setting to prioritize when photographing athletes coming toward the camera, it is continuous autofocus.

Depending on the camera brand, it may be called:

  • AF-C
  • AI Servo
  • Continuous AF
  • Continuous Servo AF

The basic idea is the same: instead of focusing once and staying locked at that distance, the camera continually adjusts focus as the subject moves.

This is particularly important when the athlete is running toward you because the focus distance changes throughout the sequence.

For example, suppose you focus on a runner’s face when they’re 30 meters away. If you continue using a single-shot autofocus mode, the camera may remain focused at that original distance. By the time the runner reaches 15 meters away, the athlete may be noticeably out of focus.

Continuous autofocus gives the camera an opportunity to keep updating the focus distance.

Don’t Just Turn AF-C On and Forget About It

Continuous autofocus works best when you help the camera identify and follow the correct subject.

Depending on your camera, you may have options such as:

  • Subject tracking
  • Human detection
  • Face detection
  • Eye detection
  • Zone autofocus
  • Dynamic-area autofocus
  • Wide-area autofocus
  • 3D tracking

Modern cameras can recognize people and track their eyes or faces, which can be particularly useful when photographing athletes approaching the camera. Nikon, for example, documents the use of AF-C combined with subject detection and 3D Tracking for photographing athletes.


Choose the Right Autofocus Area

Your autofocus area can make a significant difference when photographing approaching athletes.

If you use an extremely small autofocus point, maintaining it over a rapidly approaching athlete can be difficult.

On the other hand, using an extremely wide autofocus area may give the camera too much freedom. It could potentially select another athlete, a referee, spectator, or background element instead of your intended subject.

A small or medium zone can be a useful compromise when you can predict where the athlete will be.

For example, if you’re photographing a runner coming straight down a particular lane, you can position your autofocus area over that lane and maintain the athlete within it.

For sports with unpredictable movement, subject tracking or a wider autofocus area may be more practical.

The ideal setting depends heavily on the sport and how crowded the scene is. Nikon’s sports photography guidance similarly describes different AF-area approaches depending on whether the subject is obscured, suddenly appears in the frame, or moves through a relatively predictable area.


Use Eye and Face Detection When It Works Well

When photographing people, the face is usually one of the most important parts of the photograph.

A perfectly sharp uniform isn’t particularly useful if the athlete’s face is soft.

If your camera has reliable human or eye detection, try enabling it for sports photography. The technology can help the camera prioritize the athlete’s face or eye as the subject approaches.

This can be especially effective for:

  • Runners
  • Cyclists
  • Swimmers
  • Soccer players
  • Basketball players
  • Tennis players
  • Track athletes
  • Marathon runners

However, don’t assume eye detection will always work perfectly.

Helmets, sunglasses, protective equipment, unusual body positions, poor lighting, and multiple athletes in the frame can make tracking more difficult.

Always test your camera’s autofocus behavior before the most important part of the event.


Use a Burst Mode—but Don’t Hold It Forever

Burst shooting is extremely useful for sports photography.

An athlete running toward you can produce several interesting moments within a very short period:

  1. The athlete approaches.
  2. One foot strikes the ground.
  3. The opposite leg moves forward.
  4. The athlete’s arms reach a strong position.
  5. Their face shows concentration.
  6. They pass the ideal shooting position.

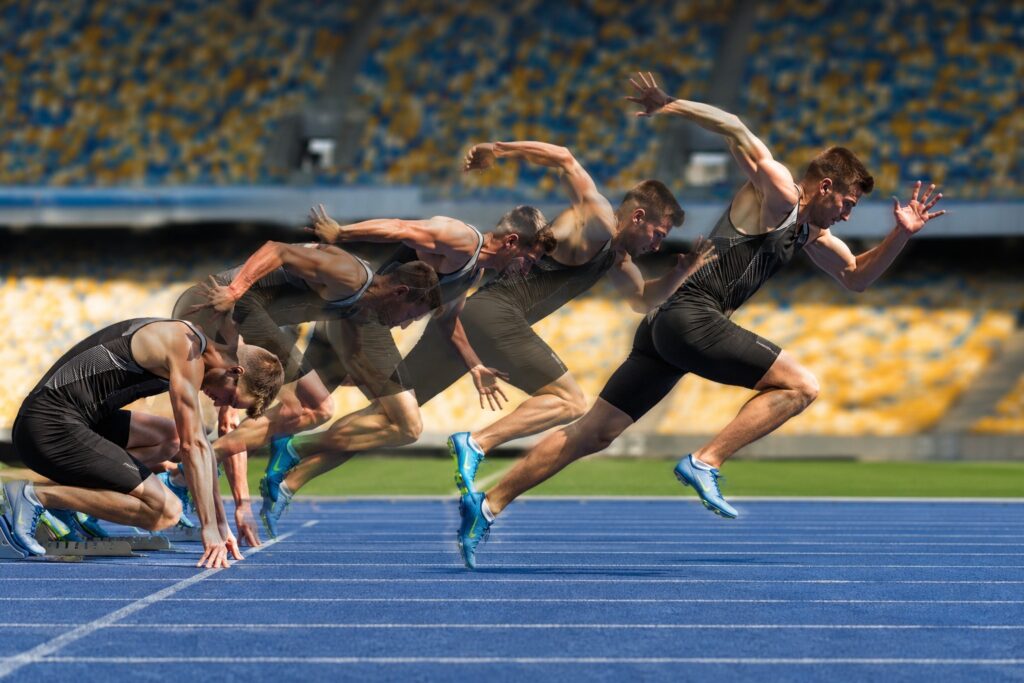
You may want to capture a short sequence rather than relying on a single frame.

Use your camera’s continuous drive mode and shoot short bursts around the anticipated peak moment.

The goal isn’t necessarily to hold down the shutter button for several seconds. Long bursts can fill your memory card quickly and may cause the camera’s buffer to slow down.

Instead, learn to anticipate the moment and use controlled bursts.


Anticipation Is More Important Than Reaction

One of the biggest differences between casual sports photography and experienced sports photography is anticipation.

A beginner often sees something happen and then tries to photograph it.

An experienced photographer tries to predict when it will happen.

That distinction matters because sports action happens incredibly quickly.

If you’re photographing a soccer player running toward you, don’t wait until the player reaches the perfect position before thinking about the photograph. You should already have the camera focused, your composition established, and your finger ready before the athlete reaches that point.

Learn the rhythm of the sport.

Watch how the players move.

Look for patterns.

Pay attention to where athletes accelerate, where they turn, and where important moments are likely to occur.

The better you understand the sport, the less you’ll rely on luck.


Position Yourself Where Athletes Will Approach You

Your position can determine the quality of your photographs before you even lift the camera.

When possible, look for locations where athletes naturally move toward your shooting position.

For example, at a track event, the finish area can provide opportunities to photograph runners approaching the camera.

At a cycling event, a straight section leading into a turn or finish line can produce strong head-on images.

At a soccer match, positioning near an attacking area can give you opportunities to photograph players running toward you rather than constantly moving away.

Always follow the venue’s rules regarding photographer access and safe positioning. Never place yourself somewhere that could interfere with athletes or put you in danger.


Keep the Athlete’s Face Visible

A photograph of an athlete coming toward you is often strongest when you can clearly see their face.

Facial expression adds emotion and context.

Look for:

  • Determination
  • Concentration
  • Excitement
  • Celebration
  • Exhaustion
  • Surprise
  • Intensity

This is one reason head-on sports photographs can be so effective.

Instead of seeing only an athlete’s body moving through a scene, the viewer can connect with the person participating in the event.

When composing your shot, try to keep the face unobstructed whenever possible.


Give the Athlete Room in the Frame

Composition becomes particularly important when an athlete is moving toward you.

You don’t want to crop the athlete awkwardly as they approach.

Instead, consider leaving some space around the subject.

If you’re photographing the athlete slightly from an angle, leave additional room in the direction they’re moving.

This gives the photograph a sense of space and prevents the composition from feeling cramped.

However, because the athlete is approaching you, the amount of available space changes quickly.

That’s another reason why shooting a short burst can help.


Choose the Right Lens

Your lens affects how easily you can photograph an athlete coming toward you.

A telephoto lens can be extremely useful at sporting events because photographers often cannot stand directly beside the action.

Common sports photography focal lengths include:

  • 70-200mm
  • 100-400mm
  • 200-500mm
  • 300mm
  • 400mm
  • 600mm

The right choice depends on the sport and your shooting position.

A 70-200mm lens can be particularly versatile because it allows you to capture both relatively tight portraits and wider action scenes.

A longer telephoto lens can be useful when you’re positioned farther away.

However, longer isn’t automatically better.

If an athlete is running directly toward you, a lens that is too long can make it difficult to keep the subject in the frame as they get closer.


Don’t Zoom in Too Much

One common mistake is starting with an extremely tight composition.

You might frame the athlete’s head and shoulders beautifully when they’re 40 meters away. Then the athlete gets closer and suddenly their face is filling the entire frame.

By the time you zoom out, you’ve missed the moment.

If you’re expecting the athlete to move significantly closer, start slightly wider.

You can always crop a little during editing.

You cannot recover an athlete’s head or feet that were accidentally cut off at the moment of capture.


Use a Wide Aperture When Appropriate

A wide aperture can help separate an athlete from a distracting background.

Settings such as:

  • f/2.8
  • f/3.2
  • f/4

can create attractive background separation while allowing more light to reach the sensor.

However, there’s a trade-off.

A very wide aperture creates a shallower depth of field. If the athlete is approaching rapidly, the plane of focus is constantly changing.

If your focus tracking isn’t perfectly consistent, an extremely shallow depth of field can make focusing mistakes more obvious.

In some situations, stopping down slightly to f/4 or f/5.6 can provide a little more depth of field while still producing useful background separation.

The best aperture depends on your lens, available light, desired background appearance, and how much depth of field you need.


Don’t Be Afraid to Increase ISO

One of the biggest mistakes beginners make in sports photography is being too afraid of ISO.

They may choose ISO 100 because they want the cleanest possible image, but the resulting shutter speed might be too slow to freeze the athlete.

A sharp image with some noise is generally more useful than a clean but motion-blurred image.

If the lighting is poor, increase ISO enough to maintain an appropriate shutter speed.

Modern cameras can produce usable images at relatively high ISO settings, and noise can often be reduced during post-processing.

The priority should generally be:

Get the motion sharp first, then optimize image quality.


Recommended Starting Settings

If you’re photographing an athlete running directly toward you outdoors during the day, try starting with:

Shutter speed: 1/1000 sec
Aperture: f/4
ISO: Auto or adjusted according to the light
Focus: AF-C / AI Servo
AF area: Subject tracking or medium zone
Drive: High-speed continuous
File format: RAW if your workflow supports it

For faster action or particularly critical moments, experiment with 1/1600 to 1/2000 sec.

A current sports photography guide from Tamron similarly recommends approximately 1/1000 second or faster for freezing many types of sports action, with faster shutter speeds for more rapid movement.

These are starting points rather than universal settings.


How to Photograph a Runner Coming Toward You

Track and field is one of the easiest sports in which to practice this technique because runners generally follow predictable lanes.

Before the race reaches your position, establish your composition.

Choose a point where you expect the runner to be at the peak of the frame.

Start tracking the athlete before they reach that point.

Keep the autofocus area over the athlete’s upper body or face and maintain continuous autofocus.

As the runner gets closer, smoothly follow their movement rather than making sudden camera movements.

Use a fast shutter speed to freeze their stride.

Pay particular attention to the runner’s face, hands, and feet. These areas can reveal whether your shutter speed and focus are working effectively.


Photographing Cyclists Coming Toward the Camera

Cyclists create a particularly interesting challenge because their speed can be significant while their body position remains relatively compact.

A head-on cycling photograph can emphasize:

  • Helmet and facial expression
  • Body position
  • Road texture
  • Bicycle details
  • Speed
  • Race atmosphere

Try photographing cyclists as they approach a bend, climb, or finish area.

A slightly lower camera position can make the cyclist appear more prominent against the background.

Just make sure you’re positioned somewhere safe and permitted.


Photographing Soccer Players Running Toward You

Soccer can be more difficult because several players may enter the frame simultaneously.

A player running directly toward you might suddenly be joined by:

  • A defender
  • A teammate
  • The goalkeeper
  • The referee

This can confuse autofocus systems.

If your camera supports subject detection, test whether it reliably maintains the intended athlete.

Otherwise, a smaller autofocus area can give you more control.

Watch the play rather than simply following the ball. If a player is breaking toward the goal, anticipate where the player will be a moment later.

That gives you time to prepare the composition before the decisive action arrives.


Photographing Basketball Players Driving Toward the Basket

Basketball is particularly challenging because players can move toward you extremely quickly and change direction without warning.

For basketball, consider using:

  • A fast shutter speed
  • Continuous autofocus
  • A wide or zone AF area
  • A wide-aperture lens
  • Higher ISO in darker gyms
  • Short bursts

The player’s face can be especially important.

Try to capture the athlete as they approach the basket, rather than only photographing the final jump.

Expressions, defensive pressure, and body position can create stronger storytelling images.


Watch Your Background

A sharp athlete against a chaotic background can still produce a distracting photograph.

Before the action begins, examine what will appear behind the athlete.

Look for:

  • Advertising boards
  • Bright lights
  • Empty seats
  • Poles
  • Fences
  • Signs
  • Distracting spectators
  • Other photographers

Whenever possible, position yourself so that the background is relatively clean.

A wide aperture can help soften distracting elements, but composition should do most of the work.

A great sports photograph isn’t simply about making the athlete sharp. It’s also about controlling everything surrounding the athlete.


Try a Lower Shooting Angle

Shooting from a lower position can make an approaching athlete appear more powerful.

The lower perspective can emphasize the athlete’s height, stride, and movement.

It can also simplify the background by placing the athlete against more sky, stadium seating, or distant scenery.

Experiment with different perspectives:

  • Eye level
  • Slightly below eye level
  • Low angle
  • Slight side angle
  • Centered head-on composition

Changing your position can completely change the feeling of the photograph even when the camera settings remain identical.


Don’t Forget About the Peak Moment

An athlete running toward the camera creates many frames, but not all of them will have the same visual impact.

Look for moments when:

  • Both feet are briefly off the ground
  • One leg reaches a powerful stride
  • Arms create a strong shape
  • The athlete’s face shows intensity
  • Equipment is clearly visible
  • The athlete crosses an important landmark
  • The athlete celebrates

The goal isn’t simply to photograph movement.

The goal is to photograph a meaningful moment within the movement.


What to Do When Autofocus Keeps Missing

If your camera frequently focuses behind or in front of the athlete, don’t immediately assume that the camera is defective.

Check your technique first.

Keep the AF area on the athlete

If your focus point repeatedly moves onto the background, the camera may simply be following what you’ve given it.

Start tracking earlier

Give the autofocus system time to acquire the athlete before the most important moment.

Use a suitable AF area

A tiny focus point may be difficult to keep over a rapidly approaching subject.

Check your shutter speed

A correctly focused photograph can still look blurry if the shutter speed is too slow.

Watch for obstructions

Another athlete, referee, net, fence, or piece of equipment can temporarily interfere with autofocus.

Some cameras provide tracking sensitivity or lock-on controls that can help maintain focus when subjects are briefly obscured.


Practice Before the Main Event

You don’t need a professional sporting event to practice this technique.

Ask a friend to walk or jog toward you.

Start slowly.

Practice keeping the autofocus point over their face.

Then increase the speed.

Try different shutter speeds and autofocus areas.

After each sequence, examine the photographs at 100% magnification.

Ask yourself:

  • Is the face sharp?
  • Are the eyes sharp?
  • Are the hands and feet sharp?
  • Did autofocus stay on the subject?
  • Was the shutter speed fast enough?
  • Was the athlete framed properly?
  • Was the background distracting?
  • Did I start shooting too early or too late?

This kind of deliberate practice can improve your sports photography much faster than simply taking hundreds of random photographs at an event.


Common Mistakes When Photographing Athletes Coming Toward You

Using Single-Shot Autofocus

This can cause the camera to focus at the athlete’s earlier position rather than their current position.

Use continuous autofocus for moving subjects.

Using a Slow Shutter Speed

Even perfect autofocus can’t eliminate motion blur caused by subject movement.

Start around 1/1000 second and adjust according to the sport.

Starting Too Tight

Leave enough room for the athlete to approach without immediately filling the frame.

Waiting Until the Last Second

If you wait until the athlete reaches the perfect position before focusing and composing, you may miss the decisive moment.

Ignoring the Background

A technically sharp athlete can still produce a weak image if distracting objects compete for attention.

Shooting Only One Frame

Sports moments happen quickly. Short bursts can increase your chances of capturing the strongest frame.

Ignoring the Sport

Knowing what is likely to happen next is one of the greatest advantages a sports photographer can develop.


How to Make Approaching-Athlete Photos More Dramatic

Once you’ve mastered the technical basics, experiment with your composition.

Try placing the athlete directly in the center of the frame for a powerful, symmetrical image.

Alternatively, place the athlete slightly off-center and include the track, field, road, or court around them.

You can also experiment with vertical compositions when the athlete’s full body is important.

For close-up images, concentrate on the face and upper body.

For storytelling photographs, step back and include the environment.

A collection of sports photographs becomes much more interesting when it contains different perspectives rather than dozens of nearly identical close-ups.

source: B&H Photo Video Pro Audio

When to Use Motion Blur Instead

Freezing an approaching athlete isn’t the only option.

Sometimes motion blur can communicate speed more effectively than a completely frozen frame.

For example, you might deliberately reduce your shutter speed and pan with a cyclist or runner.

This technique works particularly well when the athlete is moving across your frame rather than directly toward you.

A shutter speed around 1/60 to 1/125 second can be a starting point for experimental panning, although the ideal setting depends on the subject and speed. Tamron also describes slower shutter speeds such as 1/60 and 1/125 for deliberate panning effects.

This is a different technique from freezing an athlete coming toward the camera, but it’s worth learning once you’re comfortable with standard sports photography.


Final Thoughts

Photographing athletes coming straight toward the camera combines autofocus technique, shutter speed, composition, timing, and anticipation.

The most important place to start is with continuous autofocus and a fast shutter speed. From there, learn how to keep the autofocus area on your subject, use short bursts, choose an effective shooting position, and anticipate where the athlete will be rather than simply reacting to where they are now.

A practical starting setup is AF-C or AI Servo, around 1/1000 second or faster, a suitable aperture for the available light, Auto ISO when necessary, and continuous burst shooting.

Once those fundamentals become second nature, you can concentrate less on your camera settings and more on the athlete.

That’s when sports photography becomes much more rewarding.

The goal isn’t simply to produce a technically sharp photograph. It’s to capture the instant when speed, effort, emotion, and anticipation come together in one frame.

The written content on this page was generated by ChatGPT.

Back Button Focus Explained for Sports Photographers

Back Button Focus is one of the most valuable techniques sports photographers can learn. Once you separate focusing from the shutter button, you’ll notice faster reactions, more consistent focus, and fewer missed shots. Whether you’re photographing a football player charging down the field, a sprinter crossing the finish line, or a basketball player soaring toward the hoop, this simple camera setting can dramatically improve your keeper rate.

Many professional sports photographers rely on Back Button Focus because it gives them greater control over autofocus, especially when subjects are moving unpredictably. If you’ve ever wondered how professionals consistently capture razor-sharp action shots, Back Button Focus is one of their biggest secrets.

Back Button Focus Explained for Sports Photographers
image generated by ChatGPT

Back Button Focus Explained for Sports Photographers

Capturing the perfect sports photograph often comes down to a fraction of a second. Athletes rarely stay still, and their movements can change direction instantly. A camera that struggles to keep up can easily produce soft or completely out-of-focus images.

Back Button Focus (BBF) changes the way your camera focuses by assigning autofocus to a button on the back of the camera instead of the shutter release. This allows photographers to independently control focusing and taking the picture, resulting in faster, more accurate autofocus during sports.

Whether you’re just beginning sports photography or looking to improve your success rate at professional sporting events, understanding Back Button Focus can transform your photography.


What Is Back Button Focus?

By default, most cameras perform two actions when you half-press the shutter button:

  • Activate autofocus
  • Meter the exposure

When you fully press the shutter, the camera captures the image.

Back Button Focus separates these actions.

Instead of half-pressing the shutter to focus, autofocus is activated using a dedicated rear button, commonly labeled:

  • AF-ON
  • AE-L/AF-L
  • AF Button

The shutter button then becomes responsible for only one task:

Taking the photograph.

This separation gives photographers complete control over when the camera focuses.


Why Sports Photographers Love Back Button Focus

Sports move fast.

Football players suddenly change direction.

Soccer players sprint toward the goal.

Baseball players swing in milliseconds.

Cyclists race past at incredible speeds.

Every second counts.

With traditional autofocus, every half-press tells the camera to refocus.

Sometimes that’s exactly what you want.

Other times it causes the camera to hunt for focus right before the decisive moment.

Back Button Focus eliminates this problem.

Once you’ve achieved focus, the camera won’t refocus until you intentionally press the rear autofocus button again.

This creates much more predictable focusing.


The Biggest Benefits of Back Button Focus

Better Tracking of Moving Subjects

Continuous autofocus works exceptionally well with BBF.

Simply hold the AF-ON button while tracking an athlete.

The autofocus system continuously updates focus while your thumb remains on the button.

When the perfect moment happens, simply press the shutter.

No delay.

No unexpected refocusing.

This is ideal for:

  • Football
  • Soccer
  • Hockey
  • Basketball
  • Motorsports
  • Cycling
  • Running events

Faster Reaction Time

Since focusing is already happening separately, your shutter button responds instantly.

You’re no longer waiting for autofocus confirmation.

This is especially valuable during:

  • Goal celebrations
  • Tackles
  • Dunks
  • Finish-line moments
  • Diving catches

Milliseconds matter.


Easier Subject Recomposition

Sometimes the athlete isn’t positioned where you want them inside the frame.

With BBF:

  • Focus once.
  • Release the AF button.
  • Recompose your shot.
  • Take as many photos as needed.

The focus remains locked until you decide otherwise.

This is perfect for portraits of athletes before or after competitions as well.


Fewer Missed Shots

One of the most frustrating moments in sports photography is watching your camera focus on:

  • the referee
  • another athlete
  • the crowd
  • the goal post
  • the fence

Instead of your intended subject.

Back Button Focus greatly reduces these accidental focus changes because the shutter no longer activates autofocus.


How Back Button Focus Works

Imagine photographing a sprinter.

With normal autofocus:

  1. Half press shutter.
  2. Camera focuses.
  3. Full press.
  4. Camera may refocus again.

Now imagine the athlete changes direction.

The camera might hesitate.

With BBF:

  1. Hold AF-ON.
  2. Camera continuously tracks.
  3. Release AF-ON when desired.
  4. Press shutter anytime.

The shutter never interrupts your focus.


How to Enable Back Button Focus

Every camera brand is slightly different, but the overall process is similar.

Canon

  • Open Custom Controls.
  • Disable autofocus from the shutter button.
  • Assign AF-ON for autofocus.

Nikon

  • Open Custom Settings.
  • Select Autofocus.
  • Disable shutter AF.
  • Assign AF-ON.

Sony

  • Open Custom Key Settings.
  • Assign AF-ON.
  • Disable AF with shutter.

Fujifilm

  • Turn off Shutter AF.
  • Assign AF-ON to a rear button.
  • Customize button layout if needed.

Always consult your camera manual for model-specific instructions.


Best Autofocus Mode to Pair with Back Button Focus

Most sports photographers use:

Continuous Autofocus

Known as:

  • AI Servo (Canon)
  • AF-C (Sony, Nikon, Fujifilm)

This allows the camera to continuously adjust focus while your thumb remains on AF-ON.

Avoid Single Shot AF for fast-moving sports.


Best Camera Settings for Back Button Focus

Although every sport is different, these settings work well for most outdoor sporting events.

Shutter Speed

  • 1/1000 sec
  • 1/1600 sec
  • 1/2000 sec

Fast enough to freeze movement.

Aperture

f/2.8–f/4 for subject isolation.

f/5.6–f/8 when photographing multiple athletes.

ISO

Adjust according to available light.

  • ISO 100–400 outdoors
  • ISO 800–3200 indoors
  • Higher when necessary

Drive Mode

Use Continuous High Speed Burst.

Focus Area

Dynamic Area AF

Zone AF

Expanded Flexible Spot

These provide excellent athlete tracking.


When Should You Release the AF Button?

This depends on the situation.

Keep Holding It

When photographing:

  • football plays
  • soccer attacks
  • hockey rushes
  • basketball fast breaks

Continuous tracking keeps focus updated.


Release It

When:

  • waiting for the athlete
  • photographing awards
  • shooting team portraits
  • composing a creative frame

Focus stays locked.


Sports That Benefit Most from Back Button Focus

Nearly every sport benefits.

Football

Track quarterbacks and receivers with continuous focus.

Basketball

Perfect for drives to the basket.

Soccer

Follow players sprinting across the pitch.

Baseball

Track runners stealing bases.

Tennis

Follow serves and volleys.

Cycling

Maintain focus during high-speed passes.

Motorsports

Excellent when combined with panning.

Swimming

Track swimmers approaching the wall.


Common Mistakes Beginners Make

Forgetting to Press AF-ON

This happens frequently during the first week.

Practice until it becomes muscle memory.


Using Single Autofocus

Continuous AF is almost always the better choice for sports.


Letting Go Too Early

If the athlete is still moving, continue holding AF-ON.


Using the Wrong Focus Area

Avoid letting the camera automatically choose all focus points.

Instead, use:

  • Zone AF
  • Dynamic Area
  • Expand AF

These provide better control.


Practice Exercises

Try these before photographing a live sporting event.

Exercise 1

Photograph passing cars.

Track each vehicle while holding AF-ON.

Exercise 2

Photograph cyclists at a park.

Practice continuous tracking.

Exercise 3

Photograph children playing.

Their unpredictable movement closely resembles many sports.

Exercise 4

Visit a local running trail.

Practice maintaining focus throughout an entire stride sequence.


Does Back Button Focus Work for Wildlife?

Absolutely.

Many wildlife photographers use the exact same technique because birds, animals, and athletes all move unpredictably.

If you enjoy photographing both sports and wildlife, learning BBF gives you an advantage in both genres.

source: Simon d’Entremont

Is Back Button Focus Worth Learning?

Without question.

It may feel awkward during the first few days, but once it becomes second nature, many photographers never switch back to traditional shutter-button autofocus.

Back Button Focus provides greater control, faster response times, and more reliable autofocus performance in demanding situations. Combined with continuous autofocus, burst shooting, and proper camera settings, it helps you capture more sharp, decisive moments and fewer missed opportunities.

If your goal is to consistently produce professional-looking sports photographs, mastering Back Button Focus is one of the smartest investments you can make. The technique requires no additional equipment, costs nothing to enable, and can significantly increase the number of sharp, action-packed images you bring home from every sporting event.

The written content on this page was generated by ChatGPT.
Burst Mode Secrets: Never Miss a Decisive Sports Moment

There is a split second in every sporting event that tells the entire story. It might be a soccer player striking the winning goal, a basketball player soaring toward the rim, a baseball bat connecting with the ball, or a cyclist crossing the finish line with pure determination on their face. These moments happen so quickly that even experienced photographers can miss them if their camera isn’t ready.

This is where burst mode becomes one of the most valuable features in sports photography. Instead of relying on a single press of the shutter button, burst mode captures a rapid sequence of images, dramatically increasing your chances of getting the perfect frame.

Whether you’re photographing youth sports, professional competitions, school athletic events, or local tournaments, understanding how to use burst mode effectively will help you consistently capture breathtaking action shots that showcase speed, emotion, and athletic performance.

This guide explains everything you need to know about burst mode, including camera settings, timing techniques, autofocus tips, memory card selection, and professional secrets that can elevate your sports photography.

Burst Mode Secrets: Never Miss a Decisive Sports Moment
image generated by ChatGPT

What Is Burst Mode?

Burst mode, sometimes called Continuous Shooting Mode, allows your camera to capture multiple photographs every second while the shutter button remains pressed.

Instead of taking only one image, modern cameras can shoot anywhere from:

  • 5 frames per second (FPS)
  • 10 FPS
  • 20 FPS
  • 30 FPS
  • Even over 100 FPS on specialized professional cameras

Rather than hoping your timing is perfect, burst mode gives you an entire sequence of photographs, allowing you to choose the exact instant where everything comes together.


Why Burst Mode Is Essential for Sports Photography

Sports are unpredictable.

Athletes constantly change direction, jump, dive, accelerate, collide, and celebrate—all within fractions of a second.

Using single-shot mode means you’re gambling on perfect timing.

Burst mode dramatically improves your odds because it captures every stage of the movement.

Examples include:

  • The exact moment a football player catches the ball
  • A tennis racket making contact with the ball
  • A gymnast suspended in mid-air
  • A skateboarder performing a trick
  • A baseball pitcher releasing the ball
  • A swimmer breaking through the water
  • A cyclist leaning into a sharp corner

Having multiple frames lets you choose the strongest composition instead of settling for “almost.”


How Burst Mode Works

Every camera has a maximum frame rate.

Professional sports cameras are built with incredibly fast processors and image buffers, allowing photographers to shoot continuously without slowing down.

When you hold the shutter button:

  1. The autofocus continuously tracks your subject.
  2. The shutter fires repeatedly.
  3. Images are temporarily stored in the camera’s internal buffer.
  4. The photos are then written to your memory card.

A fast buffer and memory card are just as important as a fast camera.


Choosing the Right Continuous Shooting Mode

Many cameras include different continuous shooting speeds.

These commonly include:

Low-Speed Continuous

Ideal for slower sports such as:

  • Golf
  • Bowling
  • Archery
  • Horse shows

Lower frame rates produce fewer unnecessary images.


High-Speed Continuous

Perfect for:

  • Soccer
  • Basketball
  • Football
  • Baseball
  • Volleyball
  • Rugby
  • Hockey

High-speed burst captures every important movement during fast action.


Silent Continuous Shooting

Mirrorless cameras often include silent electronic burst mode.

Advantages include:

  • No distracting shutter sound
  • Better for indoor events
  • Excellent for golf tournaments
  • Great for gymnastics competitions
  • Useful during tennis matches

Always verify whether silent shooting causes rolling shutter distortion during very fast movement.


Best Camera Settings for Burst Mode

Burst mode performs best when combined with the proper exposure settings.

Shutter Speed

Sports demand fast shutter speeds.

General recommendations:

  • Running: 1/1000 second
  • Soccer: 1/1250 second
  • Basketball: 1/800 second
  • Football: 1/1250 second
  • Tennis: 1/1600 second
  • Baseball: 1/1600 second
  • Cycling: 1/1600 second
  • Motorsports: 1/2000 second

If you intentionally want motion blur, slower speeds can produce artistic results.


Aperture

Choose wider apertures whenever possible.

Examples include:

  • f/2.8
  • f/4
  • f/5.6

Benefits include:

  • Faster shutter speeds
  • More background blur
  • Better subject isolation
  • Improved low-light performance

ISO

Adjust ISO according to lighting.

Typical settings include:

  • ISO 100–200 for bright daylight
  • ISO 400–800 for cloudy weather
  • ISO 1600–3200 for indoor arenas
  • ISO 6400 or higher for nighttime sports

Modern cameras handle higher ISO values much better than older models.


Pair Burst Mode with Continuous Autofocus

Burst mode alone isn’t enough.

You also need continuous autofocus.

Different camera brands use different names:

  • Canon — AI Servo AF
  • Nikon — AF-C
  • Sony — AF-C
  • Fujifilm — Continuous AF
  • OM System — C-AF

Continuous autofocus predicts movement while your camera keeps firing.

This combination dramatically increases the number of sharp images.


Focus Tracking Makes the Difference

Today’s mirrorless cameras use advanced subject detection powered by artificial intelligence.

Features may include:

  • Eye detection
  • Face detection
  • Human tracking
  • Animal tracking
  • Vehicle tracking

When photographing sports, athlete tracking helps keep your subject sharp even when other players cross in front of them.


Anticipation Is Better Than Holding the Shutter Forever

One common mistake beginners make is holding down the shutter during the entire game.

This quickly fills memory cards, slows editing, and overwhelms your camera’s buffer.

Professional sports photographers anticipate the action.

Examples include:

  • A striker approaching the goal
  • A quarterback preparing to throw
  • A sprinter entering the finish line
  • A volleyball player jumping for a spike
  • A cyclist approaching a dramatic corner

Short, controlled bursts are usually more effective than continuous shooting for several minutes.


Understanding Camera Buffer Limits

Every camera eventually reaches its buffer limit.

Once the buffer fills:

  • Shooting slows down
  • Frame rate drops
  • Images take longer to save

You can reduce buffer problems by:

  • Using fast memory cards
  • Shooting JPEG instead of RAW when appropriate
  • Using compressed RAW formats
  • Limiting unnecessary bursts
  • Buying cameras with larger internal buffers

Use High-Speed Memory Cards

Your memory card plays a huge role in burst photography.

Fast cards empty the camera buffer much quicker.

Recommended options include:

  • UHS-II SD cards
  • CFexpress Type A
  • CFexpress Type B
  • XQD cards (supported cameras)

Slower cards often become the biggest bottleneck during continuous shooting.


Perfect Timing Still Matters

Burst mode isn’t a substitute for timing.

Instead, it enhances good timing.

Start your burst just before the expected action.

Continue briefly after the action ends.

This ensures you capture:

  • Build-up
  • Peak action
  • Follow-through
  • Athlete reactions
  • Celebrations

Sometimes the celebration after the winning goal becomes the most memorable photograph.


Sports That Benefit Most from Burst Mode

Almost every sport benefits from continuous shooting.

Examples include:

Football

Capture tackles, catches, interceptions, and touchdowns.

Soccer

Freeze headers, bicycle kicks, goalkeeper saves, and celebrations.

Basketball

Perfect for dunks, rebounds, steals, and jump shots.

Baseball

Ideal for swings, pitching, catches, and slides into home plate.

Volleyball

Excellent for spikes, blocks, serves, and diving saves.

Cycling

Capture riders sprinting, climbing hills, navigating corners, and crossing finish lines.

Swimming

Photograph splashes, dives, flip turns, and victory moments.

Gymnastics

Burst mode captures twists, flips, and graceful landings.


Improve Composition While Shooting Bursts

Don’t forget composition simply because your camera is shooting rapidly.

Keep in mind:

  • Leave space ahead of moving athletes.
  • Avoid cutting off hands, feet, or equipment.
  • Watch for distracting backgrounds.
  • Use leading lines whenever possible.
  • Position yourself for clean backgrounds.

Great composition makes action photos feel even more powerful.


Common Burst Mode Mistakes

Many photographers misuse burst mode.

Avoid these common errors:

Holding the shutter too long

This creates thousands of unnecessary images.

Ignoring autofocus settings

Burst mode cannot compensate for poor focus.

Using slow memory cards

Your camera cannot maintain peak performance.

Poor timing

Burst mode helps, but anticipation remains essential.

Shooting everything in RAW

RAW files provide maximum editing flexibility but consume more storage and fill the buffer faster. Consider your workflow and the demands of the event.


Post-Processing Burst Sequences

After the event, you’ll likely have hundreds—or even thousands—of images.

An organized workflow saves time:

  • Review each burst sequence together.
  • Delete obvious misses first.
  • Compare similar frames side by side.
  • Keep only the sharpest and most expressive images.
  • Edit exposure, color, contrast, and cropping consistently.

Culling efficiently is just as important as capturing the action.


Professional Tips for Better Burst Photography

Experienced sports photographers often rely on these strategies:

  • Learn the rules of the sport so you can anticipate key moments.
  • Position yourself where the action is most likely to happen.
  • Use back-button focus to separate focusing from the shutter release.
  • Shoot from different heights to create more dynamic perspectives.
  • Watch athletes through the viewfinder even after the peak action—reactions often make the strongest images.
  • Practice regularly at local sporting events to build your timing and confidence.
source: Maggie Kirkland

Final Thoughts

Burst mode is one of the most powerful tools available to sports photographers because it dramatically increases the likelihood of capturing the exact instant that defines a game, race, or competition. Combined with fast shutter speeds, continuous autofocus, thoughtful composition, and anticipation, it allows you to create images that are sharp, energetic, and emotionally engaging.

The secret isn’t simply firing as many frames as possible—it’s knowing when to use burst mode and how to pair it with solid photographic technique. As you gain experience, you’ll begin to anticipate decisive moments before they happen, resulting in fewer missed opportunities and more memorable photographs.

Whether you’re photographing youth leagues, college athletics, or professional sporting events, mastering burst mode will help you preserve the excitement, determination, and emotion that make sports photography so compelling. Practice often, refine your timing, and you’ll soon build a portfolio filled with action-packed images that capture the very best moments of every competition.

The written content on this page was generated by ChatGPT.
Top Mistakes to Avoid with Camera Settings at Sports Events

There is something unforgettable about capturing the exact instant a soccer player scores the winning goal, a sprinter crosses the finish line, or a gymnast sticks the perfect landing. These moments happen in fractions of a second, and once they are gone, there is no opportunity for a second attempt. That is what makes sports photography both exciting and demanding.

Many photographers spend hours researching the best camera bodies and telephoto lenses, believing that expensive gear alone will produce professional-quality images. While good equipment certainly helps, the camera settings you choose before and during the event often have a much greater impact on your final results. Even a top-tier camera cannot rescue an image if the shutter speed is too slow, the autofocus misses the athlete, or the exposure is incorrect.

Every sporting event presents unique challenges. Outdoor stadiums may shift from bright sunshine to overcast skies within minutes. Indoor arenas often have inconsistent artificial lighting. Fast-moving athletes rarely stay in one place long enough for you to make adjustments after the action begins. Because of this, understanding your camera settings is one of the most valuable skills you can develop.

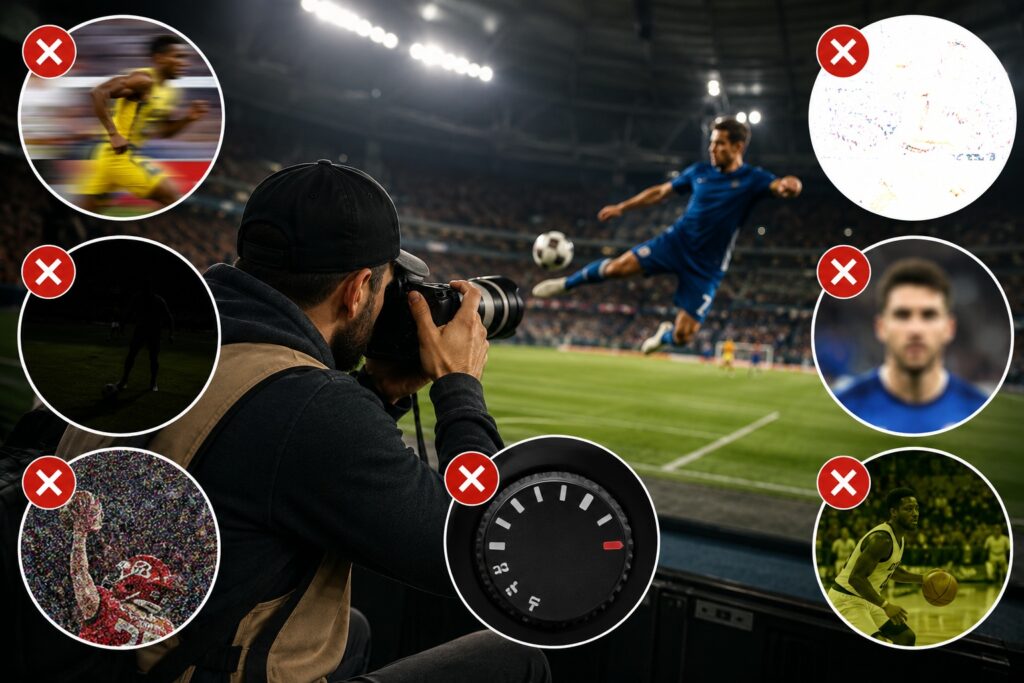
Whether you are photographing youth sports, high school championships, amateur tournaments, or professional competitions, avoiding a few common mistakes can dramatically improve the quality of your action shots. This guide explores the most frequent camera setting errors photographers make at sporting events and explains how to avoid them with confidence.

Top Mistakes to Avoid with Camera Settings at Sports Events

Why Camera Settings Matter More Than Expensive Equipment

A high-end camera is only as effective as the person using it. Professional sports photographers consistently produce stunning images because they understand how every setting works together to capture motion, maintain sharp focus, and adapt to changing conditions.

Sports photography demands speed. Your camera must react instantly while maintaining focus on subjects that may be running, jumping, diving, or racing toward you. If your settings are not optimized before the action starts, the camera can struggle to keep up, leaving you with missed opportunities and disappointing results.

Taking a few minutes to prepare your camera before the event begins can make a significant difference in the number of sharp, well-exposed images you capture.


Mistake 1: Choosing a Shutter Speed That Is Too Slow

One of the quickest ways to ruin an action photograph is by using a shutter speed that cannot freeze movement. When the shutter remains open for too long, fast-moving athletes become blurry, and important details disappear.

This mistake often happens when photographers rely entirely on automatic camera settings or forget to adjust their shutter speed after moving from a bright outdoor field into a dimly lit gymnasium.

How to Fix It

Your shutter speed should match the pace of the sport.

As a general guideline:

  • Walking or slow movement: around 1/250 second
  • Running sports: 1/500 to 1/800 second
  • Football, soccer, baseball, basketball, and volleyball: around 1/1000 second
  • Motorsport, cycling, hockey, and similar high-speed action: 1/1250 to 1/2000 second

If you’re unsure, start with a faster shutter speed and adjust only if necessary.


Mistake 2: Staying in Single Autofocus Mode

Single autofocus is designed for stationary subjects. It locks focus once and assumes your subject will remain in place.

Athletes rarely cooperate.

The moment your camera locks focus, the player has already moved somewhere else.

A Better Approach

Switch your camera to Continuous Autofocus mode.

Depending on your camera manufacturer, this feature may be called:

  • AI Servo
  • AF-C
  • Continuous AF

This allows your camera to continually adjust focus while tracking moving athletes, greatly increasing the likelihood of sharp images.


Mistake 3: Forgetting to Enable Continuous Shooting

Perfect timing is difficult, even for experienced photographers.

If your camera captures only one frame every time you press the shutter button, your chances of missing the peak action increase dramatically.

Professional sports photographers often use burst mode because it provides several opportunities instead of just one.

Why Burst Mode Helps

Continuous shooting captures multiple images each second, allowing you to choose the strongest frame afterward.

Rather than guessing the perfect instant, you record an entire sequence of movement, making it much easier to find the exact moment when the athlete’s expression, body position, and timing all come together.


Mistake 4: Keeping ISO Too Low Out of Fear

Many beginners hesitate to increase ISO because they worry about digital noise.

Ironically, this often creates a much bigger problem.

A low ISO forces your camera to use slower shutter speeds, which results in blurry action shots.

Modern editing software can reduce image noise remarkably well, but no software can restore details lost to motion blur.

Practical ISO Recommendations

Lighting conditions should determine your ISO.

For example:

  • Bright sunshine: ISO 100 to 200
  • Cloudy afternoons: ISO 400 to 800
  • Outdoor evening games: ISO 800 to 1600
  • Indoor arenas: ISO 1600 to 6400 or higher

Today’s cameras perform surprisingly well at higher ISO settings, making them much more usable than they once were.


Mistake 5: Using an Aperture That Limits Your Camera

Some photographers assume that using f/11 or f/16 will automatically produce better image quality.

In sports photography, however, these smaller apertures reduce the amount of light entering the lens.

As a result, your camera compensates by lowering shutter speed or increasing ISO.

Better Aperture Choices

Most sports photographers prefer wider apertures such as:

  • f/2.8
  • f/4
  • f/5.6

These settings allow more light into the camera while also creating attractive background blur that helps athletes stand out from distracting surroundings.


Mistake 6: Allowing the Camera to Pick Every Focus Point

Automatic focus point selection works well for casual snapshots but often struggles during sporting events.

Your camera cannot always determine which player you intend to photograph.

Instead of focusing on your subject, it may lock onto spectators, fences, goalposts, or nearby players.

Improve Focus Accuracy

Selecting a specific focus area gives you much greater control.

Popular options include:

  • Single Point AF
  • Dynamic Area AF
  • Zone AF
  • Expanded Focus Area

Experiment with each mode to determine which works best for your sport and camera system.


Mistake 7: Ignoring White Balance

Colors play an important role in sports photography.

Incorrect white balance can make uniforms look unnatural and skin tones appear unrealistic.

Indoor venues often present additional challenges because multiple lighting sources can produce unusual color casts.

What Works Best

Auto White Balance performs surprisingly well in many situations.

If lighting remains consistent, manually selecting Daylight, Cloudy, Fluorescent, or Tungsten may provide more accurate and consistent colors throughout the event.

Photographers who shoot in RAW format can also fine-tune white balance during post-processing.


Mistake 8: Forgetting About Exposure Compensation

Sports uniforms vary dramatically in brightness.

Bright white jerseys may fool your camera into producing underexposed images, while dark uniforms can lead to overexposure.

Learning to use exposure compensation allows you to make quick adjustments without completely changing your camera settings.

Even small adjustments can improve image quality.


Mistake 9: Depending Too Much on Automatic Mode

Automatic shooting modes are convenient, but they cannot predict what matters most in a fast-moving sporting event.

The camera may prioritize a lower ISO over a faster shutter speed or choose an aperture that limits subject separation.

For greater consistency, many photographers prefer:

  • Shutter Priority
  • Manual Mode with Auto ISO
  • Full Manual Mode in consistent lighting

These modes provide significantly more creative control.


Mistake 10: Arriving Without Testing Your Settings

Every sports venue has different lighting conditions.

An outdoor baseball field at noon looks very different from a basketball court illuminated by overhead lights.

Walking into an event without testing your camera almost guarantees missed opportunities.

Before the Game Starts

Take several test photographs during warm-ups.

Review them carefully for:

  • Sharpness
  • Exposure
  • White balance
  • Focus accuracy
  • Histogram
  • Noise levels

Making adjustments before the competition begins allows you to concentrate entirely on the action once play starts.


Mistake 11: Overlooking the Background

Sports photography is about more than freezing action.

A cluttered background filled with spectators, advertisements, parked vehicles, or equipment can distract viewers from the athlete.

Take a few moments to reposition yourself whenever possible.

Shooting from lower angles, using longer focal lengths, and selecting wider apertures helps simplify the background while drawing attention directly to your subject.


Mistake 12: Shooting Only JPEG

JPEG files are smaller and easier to share, but they sacrifice valuable image information during processing.

RAW files preserve significantly more detail, allowing greater flexibility during editing.

Benefits include:

  • Improved highlight recovery
  • Better shadow detail
  • More accurate color adjustments
  • Easier white balance correction
  • Greater dynamic range

For photographers who plan to edit their sports images, RAW is usually the better choice.


Mistake 13: Never Reviewing Your Images During the Event

Constantly checking your LCD screen after every shot can cause you to miss important moments.

However, failing to review your images at all can allow problems to continue throughout the game.

Instead, inspect your photos during natural breaks such as halftime, timeouts, or race intervals.

Look for recurring issues and make adjustments before play resumes.


Recommended Camera Settings for Most Sports Events

If you are just getting started, these settings provide an excellent baseline for many outdoor sporting events.

Camera SettingRecommended Starting Point
Shutter Speed1/1000 second
Aperturef/2.8 to f/5.6
ISOAuto ISO or 400 to 3200
Focus ModeContinuous AF
Drive ModeHigh-Speed Continuous
File FormatRAW
White BalanceAuto White Balance
Metering ModeEvaluative or Matrix

These settings are not universal, but they offer a dependable starting point that can be adjusted according to the lighting and pace of the sport.


Developing Better Habits Behind the Camera

Improving your sports photography is not about memorizing a list of settings. It is about learning to observe your environment and adapting quickly as conditions change.

Spend time photographing different sports whenever possible. Each event teaches something new. A soccer match may improve your tracking skills, while volleyball can help you anticipate action at the net. Cycling events are excellent for practicing panning techniques, and track meets provide opportunities to refine your timing.

After every session, review your images carefully. Identify what worked well and what could be improved. Over time, you will begin recognizing patterns that allow you to make faster decisions in the field.

The photographers who consistently produce compelling sports images are not necessarily the ones with the most expensive equipment. They are the ones who understand their cameras, prepare before the event begins, and continually refine their techniques through practice.

source: Jacob Wagler

Capturing outstanding sports photographs starts long before the first whistle, kickoff, or starting gun. The settings you choose before the action unfolds have a direct impact on whether you preserve the excitement of the moment or miss it entirely.

Avoiding common mistakes such as using a slow shutter speed, selecting the wrong autofocus mode, relying solely on automatic settings, or overlooking exposure adjustments will significantly increase your success rate. Combine these technical skills with patience, preparation, and consistent practice, and you’ll soon find yourself creating sports images that are not only sharp and well exposed but also full of energy, emotion, and storytelling power.

Every game offers a new opportunity to improve. Keep experimenting, keep learning, and most importantly, enjoy the challenge of capturing the moments that athletes and fans will remember for years to come.

The written content on this page was generated by ChatGPT.