Top Mistakes to Avoid with Camera Settings at Sports Events

There is something unforgettable about capturing the exact instant a soccer player scores the winning goal, a sprinter crosses the finish line, or a gymnast sticks the perfect landing. These moments happen in fractions of a second, and once they are gone, there is no opportunity for a second attempt. That is what makes sports photography both exciting and demanding.

Many photographers spend hours researching the best camera bodies and telephoto lenses, believing that expensive gear alone will produce professional-quality images. While good equipment certainly helps, the camera settings you choose before and during the event often have a much greater impact on your final results. Even a top-tier camera cannot rescue an image if the shutter speed is too slow, the autofocus misses the athlete, or the exposure is incorrect.

Every sporting event presents unique challenges. Outdoor stadiums may shift from bright sunshine to overcast skies within minutes. Indoor arenas often have inconsistent artificial lighting. Fast-moving athletes rarely stay in one place long enough for you to make adjustments after the action begins. Because of this, understanding your camera settings is one of the most valuable skills you can develop.

Whether you are photographing youth sports, high school championships, amateur tournaments, or professional competitions, avoiding a few common mistakes can dramatically improve the quality of your action shots. This guide explores the most frequent camera setting errors photographers make at sporting events and explains how to avoid them with confidence.
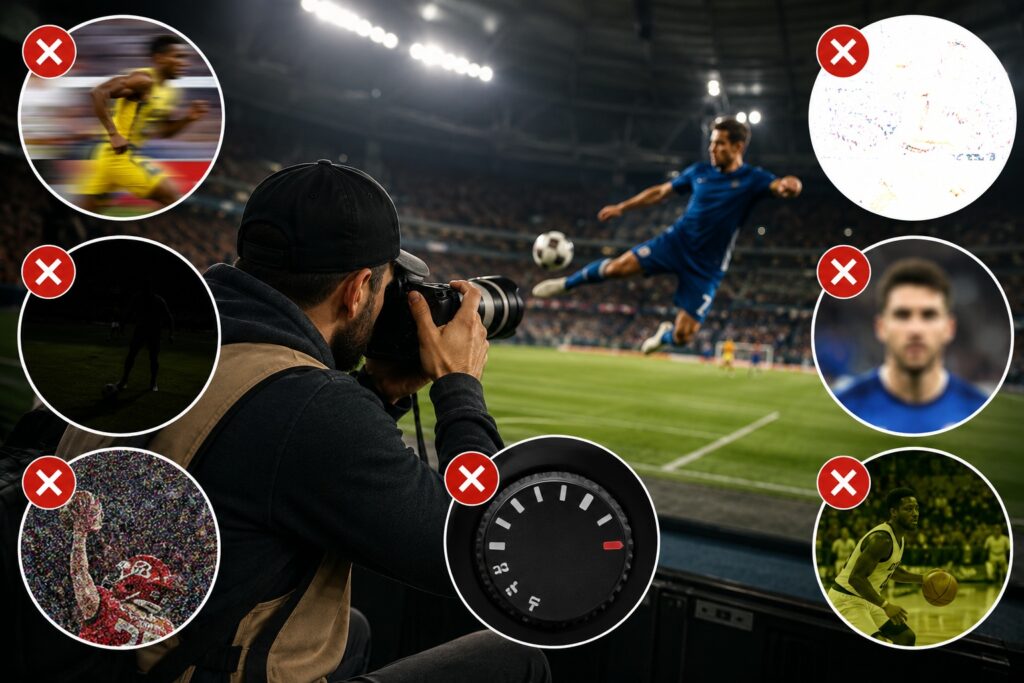
Top Mistakes to Avoid with Camera Settings at Sports Events

Why Camera Settings Matter More Than Expensive Equipment

A high-end camera is only as effective as the person using it. Professional sports photographers consistently produce stunning images because they understand how every setting works together to capture motion, maintain sharp focus, and adapt to changing conditions.

Sports photography demands speed. Your camera must react instantly while maintaining focus on subjects that may be running, jumping, diving, or racing toward you. If your settings are not optimized before the action starts, the camera can struggle to keep up, leaving you with missed opportunities and disappointing results.

Taking a few minutes to prepare your camera before the event begins can make a significant difference in the number of sharp, well-exposed images you capture.


Mistake 1: Choosing a Shutter Speed That Is Too Slow

One of the quickest ways to ruin an action photograph is by using a shutter speed that cannot freeze movement. When the shutter remains open for too long, fast-moving athletes become blurry, and important details disappear.

This mistake often happens when photographers rely entirely on automatic camera settings or forget to adjust their shutter speed after moving from a bright outdoor field into a dimly lit gymnasium.

How to Fix It

Your shutter speed should match the pace of the sport.

As a general guideline:

  • Walking or slow movement: around 1/250 second
  • Running sports: 1/500 to 1/800 second
  • Football, soccer, baseball, basketball, and volleyball: around 1/1000 second
  • Motorsport, cycling, hockey, and similar high-speed action: 1/1250 to 1/2000 second

If you’re unsure, start with a faster shutter speed and adjust only if necessary.


Mistake 2: Staying in Single Autofocus Mode

Single autofocus is designed for stationary subjects. It locks focus once and assumes your subject will remain in place.

Athletes rarely cooperate.

The moment your camera locks focus, the player has already moved somewhere else.

A Better Approach

Switch your camera to Continuous Autofocus mode.

Depending on your camera manufacturer, this feature may be called:

  • AI Servo
  • AF-C
  • Continuous AF

This allows your camera to continually adjust focus while tracking moving athletes, greatly increasing the likelihood of sharp images.


Mistake 3: Forgetting to Enable Continuous Shooting

Perfect timing is difficult, even for experienced photographers.

If your camera captures only one frame every time you press the shutter button, your chances of missing the peak action increase dramatically.

Professional sports photographers often use burst mode because it provides several opportunities instead of just one.

Why Burst Mode Helps

Continuous shooting captures multiple images each second, allowing you to choose the strongest frame afterward.

Rather than guessing the perfect instant, you record an entire sequence of movement, making it much easier to find the exact moment when the athlete’s expression, body position, and timing all come together.


Mistake 4: Keeping ISO Too Low Out of Fear

Many beginners hesitate to increase ISO because they worry about digital noise.

Ironically, this often creates a much bigger problem.

A low ISO forces your camera to use slower shutter speeds, which results in blurry action shots.

Modern editing software can reduce image noise remarkably well, but no software can restore details lost to motion blur.

Practical ISO Recommendations

Lighting conditions should determine your ISO.

For example:

  • Bright sunshine: ISO 100 to 200
  • Cloudy afternoons: ISO 400 to 800
  • Outdoor evening games: ISO 800 to 1600
  • Indoor arenas: ISO 1600 to 6400 or higher

Today’s cameras perform surprisingly well at higher ISO settings, making them much more usable than they once were.


Mistake 5: Using an Aperture That Limits Your Camera

Some photographers assume that using f/11 or f/16 will automatically produce better image quality.

In sports photography, however, these smaller apertures reduce the amount of light entering the lens.

As a result, your camera compensates by lowering shutter speed or increasing ISO.

Better Aperture Choices

Most sports photographers prefer wider apertures such as:

  • f/2.8
  • f/4
  • f/5.6

These settings allow more light into the camera while also creating attractive background blur that helps athletes stand out from distracting surroundings.


Mistake 6: Allowing the Camera to Pick Every Focus Point

Automatic focus point selection works well for casual snapshots but often struggles during sporting events.

Your camera cannot always determine which player you intend to photograph.

Instead of focusing on your subject, it may lock onto spectators, fences, goalposts, or nearby players.

Improve Focus Accuracy

Selecting a specific focus area gives you much greater control.

Popular options include:

  • Single Point AF
  • Dynamic Area AF
  • Zone AF
  • Expanded Focus Area

Experiment with each mode to determine which works best for your sport and camera system.


Mistake 7: Ignoring White Balance

Colors play an important role in sports photography.

Incorrect white balance can make uniforms look unnatural and skin tones appear unrealistic.

Indoor venues often present additional challenges because multiple lighting sources can produce unusual color casts.

What Works Best

Auto White Balance performs surprisingly well in many situations.

If lighting remains consistent, manually selecting Daylight, Cloudy, Fluorescent, or Tungsten may provide more accurate and consistent colors throughout the event.

Photographers who shoot in RAW format can also fine-tune white balance during post-processing.


Mistake 8: Forgetting About Exposure Compensation

Sports uniforms vary dramatically in brightness.

Bright white jerseys may fool your camera into producing underexposed images, while dark uniforms can lead to overexposure.

Learning to use exposure compensation allows you to make quick adjustments without completely changing your camera settings.

Even small adjustments can improve image quality.


Mistake 9: Depending Too Much on Automatic Mode

Automatic shooting modes are convenient, but they cannot predict what matters most in a fast-moving sporting event.

The camera may prioritize a lower ISO over a faster shutter speed or choose an aperture that limits subject separation.

For greater consistency, many photographers prefer:

  • Shutter Priority
  • Manual Mode with Auto ISO
  • Full Manual Mode in consistent lighting

These modes provide significantly more creative control.


Mistake 10: Arriving Without Testing Your Settings

Every sports venue has different lighting conditions.

An outdoor baseball field at noon looks very different from a basketball court illuminated by overhead lights.

Walking into an event without testing your camera almost guarantees missed opportunities.

Before the Game Starts

Take several test photographs during warm-ups.

Review them carefully for:

  • Sharpness
  • Exposure
  • White balance
  • Focus accuracy
  • Histogram
  • Noise levels

Making adjustments before the competition begins allows you to concentrate entirely on the action once play starts.


Mistake 11: Overlooking the Background

Sports photography is about more than freezing action.

A cluttered background filled with spectators, advertisements, parked vehicles, or equipment can distract viewers from the athlete.

Take a few moments to reposition yourself whenever possible.

Shooting from lower angles, using longer focal lengths, and selecting wider apertures helps simplify the background while drawing attention directly to your subject.


Mistake 12: Shooting Only JPEG

JPEG files are smaller and easier to share, but they sacrifice valuable image information during processing.

RAW files preserve significantly more detail, allowing greater flexibility during editing.

Benefits include:

  • Improved highlight recovery
  • Better shadow detail
  • More accurate color adjustments
  • Easier white balance correction
  • Greater dynamic range

For photographers who plan to edit their sports images, RAW is usually the better choice.


Mistake 13: Never Reviewing Your Images During the Event

Constantly checking your LCD screen after every shot can cause you to miss important moments.

However, failing to review your images at all can allow problems to continue throughout the game.

Instead, inspect your photos during natural breaks such as halftime, timeouts, or race intervals.

Look for recurring issues and make adjustments before play resumes.


Recommended Camera Settings for Most Sports Events

If you are just getting started, these settings provide an excellent baseline for many outdoor sporting events.

Camera SettingRecommended Starting Point
Shutter Speed1/1000 second
Aperturef/2.8 to f/5.6
ISOAuto ISO or 400 to 3200
Focus ModeContinuous AF
Drive ModeHigh-Speed Continuous
File FormatRAW
White BalanceAuto White Balance
Metering ModeEvaluative or Matrix

These settings are not universal, but they offer a dependable starting point that can be adjusted according to the lighting and pace of the sport.


Developing Better Habits Behind the Camera

Improving your sports photography is not about memorizing a list of settings. It is about learning to observe your environment and adapting quickly as conditions change.

Spend time photographing different sports whenever possible. Each event teaches something new. A soccer match may improve your tracking skills, while volleyball can help you anticipate action at the net. Cycling events are excellent for practicing panning techniques, and track meets provide opportunities to refine your timing.

After every session, review your images carefully. Identify what worked well and what could be improved. Over time, you will begin recognizing patterns that allow you to make faster decisions in the field.

The photographers who consistently produce compelling sports images are not necessarily the ones with the most expensive equipment. They are the ones who understand their cameras, prepare before the event begins, and continually refine their techniques through practice.

source: Jacob Wagler

Capturing outstanding sports photographs starts long before the first whistle, kickoff, or starting gun. The settings you choose before the action unfolds have a direct impact on whether you preserve the excitement of the moment or miss it entirely.

Avoiding common mistakes such as using a slow shutter speed, selecting the wrong autofocus mode, relying solely on automatic settings, or overlooking exposure adjustments will significantly increase your success rate. Combine these technical skills with patience, preparation, and consistent practice, and you’ll soon find yourself creating sports images that are not only sharp and well exposed but also full of energy, emotion, and storytelling power.

Every game offers a new opportunity to improve. Keep experimenting, keep learning, and most importantly, enjoy the challenge of capturing the moments that athletes and fans will remember for years to come.

The written content on this page was generated by ChatGPT.

Reviewing the Best Sports Photography Flash Units and Lighting Gear

If you’ve ever tried capturing a fast-paced sports event in low light, you already know how challenging it can be. Stadiums, gymnasiums, and arenas don’t always provide ideal lighting conditions. A well-timed flash, however, can make the difference between a dull, blurry frame and a vivid, high-impact shot that captures the intensity of the moment. For sports photographers who want every image to tell a story, mastering flash and lighting gear is absolutely essential.

The right lighting setup helps freeze movement, enhance colors, and bring life to even the most chaotic scenes. In this guide, we’ll break down the best flash units and lighting gear available today, along with tips on how to use them effectively for different sports environments.

Reviewing the Best Sports Photography Flash Units and Lighting Gear

The Power of Good Lighting in Sports Photography

Lighting is more than just illumination — it’s an artistic tool that defines the energy and emotion of an image. In sports photography, where every second counts, good lighting allows you to capture motion and emotion with accuracy. A subtle flash can highlight a sprinter’s muscles under strain, while diffused lighting can soften shadows on a basketball player’s face.

When you’re dealing with unpredictable weather, indoor shadows, or night events, the flash becomes your silent partner. It helps retain sharpness, avoids excessive noise in your images, and ensures that color accuracy isn’t lost due to uneven light. The right lighting gear also gives you creative control — whether you want to freeze sweat droplets midair or convey the drama of a dark, rain-soaked finish line.


What to Look for When Choosing Flash Units

Sports photographers don’t just need brightness; they need speed, control, and consistency. Here are some key features to consider when picking the perfect lighting setup:

  • High-Speed Sync (HSS): Lets you shoot with flash at shutter speeds beyond the normal sync limit (like 1/250s). Perfect for freezing high-speed motion without losing ambient light balance.
  • Fast Recycle Times: Rapid recovery between flashes allows for more continuous shooting during crucial moments.
  • Durability: Sports venues can be dusty, wet, or crowded. Choose flashes that can handle rough environments and long sessions.
  • Wireless Functionality: Off-camera lighting setups are easier to manage when you can trigger multiple flashes remotely.
  • Adjustable Output: Being able to tweak flash power manually gives you flexibility in balancing natural and artificial light.

Best Flash Units for Sports Photography in 2025

1. Godox V1 Pro
This flash has become a go-to for event and sports photographers alike. Its round head design creates soft, natural light, while its quick 1.5-second recycle time ensures you never miss a moment. The V1 Pro also supports wireless TTL and high-speed sync, making it a dependable choice for both indoor arenas and outdoor fields.

2. Canon Speedlite EL-5 / Nikon SB-5000 / Sony HVL-F60RM2
Each of these manufacturer-specific flashes is fine-tuned for speed and reliability. They excel in burst situations, delivering consistent light output with excellent color reproduction. Their compact build and intuitive controls make them ideal for on-the-go sports coverage.

3. Profoto A10
If you’re after professional-grade lighting, the Profoto A10 offers premium performance. Its output is smooth, and its battery endurance is exceptional. Bluetooth connectivity allows seamless control through your smartphone, giving you a portable studio setup even on the sidelines.

4. Godox AD300Pro / AD400Pro
When you’re shooting larger events or outdoor games, power is everything. The AD300Pro and AD400Pro strobes deliver robust output, fast recycling, and battery longevity. They’re lightweight, easy to transport, and built to handle demanding sessions.

5. Elinchrom ONE and Westcott FJ80 II
These compact, hybrid-friendly lights are designed for photographers who alternate between stills and video. Both provide balanced color temperatures, quick setup, and versatile mounting options — perfect for adapting to different environments quickly.


Accessories That Elevate Your Lighting Game

Even the best flash units perform better when paired with the right accessories. Here’s what every serious sports photographer should have in their kit:

  • Light Stands and Mounts: Keep your flashes steady and secure, even in windy outdoor conditions.
  • Softboxes and Diffusers: Help reduce harshness and create a more flattering, even spread of light.
  • Wireless Triggers: Reliable triggers ensure your off-camera flashes fire in sync with each shot.
  • Extra Batteries: Essential for endurance events or long tournament days where recharging isn’t an option.
  • Reflectors: Perfect for redirecting natural light when flash use isn’t allowed.

How to Use Flash Effectively During Sports Events

  1. Be Mindful of the Players: Avoid blinding athletes or interfering with gameplay. Aim your light strategically to minimize distraction.
  2. Master High-Speed Sync: Combine HSS with moderate flash output to capture sharp, vivid images in bright conditions.
  3. Mix Flash with Ambient Light: Let your flash fill in shadows rather than overpower the natural light available.
  4. Use Multiple Angles: Experiment with off-camera flashes placed around the field or court to create depth and texture.
  5. Arrive Early and Test: Conditions vary between venues — run lighting tests before the action begins.

Common Flash Mistakes to Avoid

  • Overpowering the Scene: Excessive flash can flatten your image or create unrealistic lighting.
  • Ignoring White Balance: Flash color temperature often differs from venue lighting; adjust accordingly to avoid unnatural tones.
  • Underestimating Battery Needs: Always bring spare batteries — flash recycle times slow dramatically with low power.
  • Overreliance on Built-In Flash: Pop-up flashes lack range and flexibility for high-speed events.
  • Not Understanding Venue Restrictions: Some arenas prohibit flash photography — know the rules before setting up.

Mixing Flash and Continuous Lighting

Many modern sports photographers use a hybrid setup that combines flash units with continuous LED panels. Continuous lights, such as the Aputure Amaran 60x II and Nanlite Forza 60B, provide constant illumination and allow you to preview how light falls on your subject in real time. These lights are especially useful for hybrid shooters working between photo and video during tournaments or press events.

Continuous lighting also creates a smoother workflow when switching between stills and clips, ensuring consistency in exposure and color grading. Pairing LED lights with your flash system gives you control over mood and motion — whether you’re highlighting a victorious moment or documenting the tension before the start.


Maintaining and Transporting Your Lighting Gear

Good lighting gear can be a significant investment, so maintenance matters. After each shoot:

  • Inspect Flash Heads and Ports: Check for dust or debris that can affect performance.
  • Store in Padded Bags: Protect against moisture and impact during travel.
  • Recharge Properly: Avoid overcharging batteries to extend their lifespan.
  • Use Silica Gel Packs: Prevent humidity damage inside your gear bag.

Keeping your equipment clean and dry not only ensures longevity but also guarantees consistent lighting results every time you shoot.

source: ego-shooters – photography – videography

Final Thoughts

Lighting is often the secret ingredient that separates professional-level sports photography from amateur snapshots. It captures not just the motion, but the emotion — the grit of a football tackle, the focus in a swimmer’s eyes, or the power in a sprinter’s stride. With the right combination of flash units, lighting accessories, and technique, you can freeze those decisive moments in vivid, cinematic detail.

As you experiment with your lighting setups, remember that every sport and venue presents a different challenge. Learn to adapt, stay patient, and treat light as part of the action rather than a technical afterthought. When used with creativity and precision, your flash becomes more than a tool — it becomes your artistic signature on every frame.

The written content on this page was generated by ChatGPT.
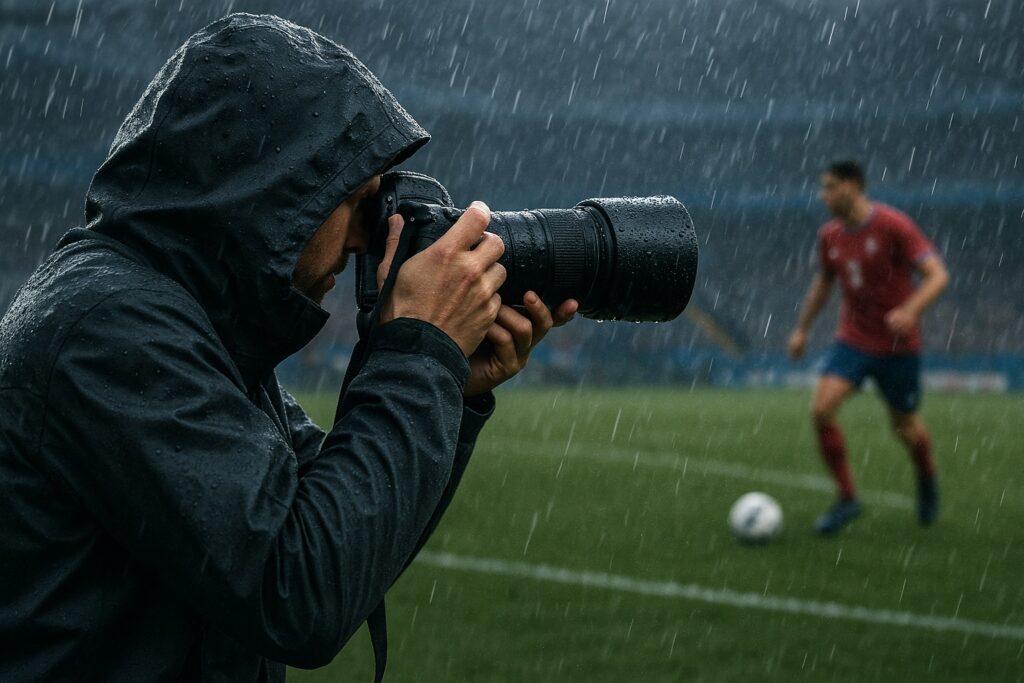
How Weatherproof Camera Gear Helps Sports Photographers Shoot in Any Condition

In the unpredictable world of outdoor sports, the weather doesn’t always cooperate. One moment the sun is shining, and the next, you’re facing heavy rain, blowing dust, or freezing winds. For sports photographers, these conditions can make or break a shoot. Having weatherproof camera gear not only protects your investment but also ensures you never miss the action — no matter what Mother Nature has planned.

This guide explores the importance of weather-sealed cameras and lenses, protective accessories, and shooting strategies that allow photographers to capture crisp, high-speed action in even the toughest environments.

How Weatherproof Camera Gear Helps Sports Photographers Shoot in Any Condition

Why Weatherproof Gear Matters in Sports Photography

Sports photographers are often on the sidelines, in the field, or at the track — not in controlled studios. Rain, mud, sand, or snow can easily damage sensitive electronics. Weatherproof gear provides the confidence to keep shooting, even when the conditions turn harsh.

A camera that can handle wind-blown dust during a motocross race or sudden rain at a soccer match ensures you never have to pack up early. Beyond protection, weather-sealed gear also helps maintain consistent image quality, preventing condensation, smudges, and lens fogging that can ruin your best shots.


Understanding Weather Sealing and Protection

Weather sealing doesn’t make a camera or lens completely waterproof, but it does make them resistant to moisture, dust, and temperature fluctuations. High-end cameras and lenses use rubber gaskets, seals, and durable materials to keep elements out.

Key Benefits of Weatherproof Gear:

  • Moisture Resistance: Prevents water from entering internal components during rain or snow.
  • Dust Protection: Keeps dirt and debris out when shooting in deserts, tracks, or fields.
  • Temperature Stability: Helps prevent condensation and mechanical issues in cold or hot climates.
  • Extended Longevity: Protects gear from corrosion and wear over time.

Best Weatherproof Cameras and Lenses for Sports Photography

Modern camera brands like Canon, Nikon, Sony, and Fujifilm have developed weather-sealed options for professionals and enthusiasts alike. When shooting outdoor sports, these are some features to prioritize:

  • Magnesium Alloy or Polycarbonate Body: Durable materials resist impact and harsh environments.
  • Sealed Buttons and Ports: Rubber gaskets around buttons, battery doors, and memory card slots prevent leaks.
  • Weather-Sealed Lenses: Pairing a sealed camera with a non-sealed lens defeats the purpose — make sure your lenses match your camera’s protection level.
  • Lens Hoods: Simple yet effective, lens hoods block rain and prevent glare.

Top Weather-Sealed Camera Lines (2025):

  • Canon EOS R5 / R6 Series
  • Nikon Z8 / Z9
  • Sony A9 III / A1
  • Fujifilm X-T5 / X-H2

Essential Accessories for Weather Protection

Even with sealed equipment, external protection adds another layer of safety. Consider investing in these practical accessories:

  • Rain Covers: Transparent covers allow you to operate your camera while keeping it dry.
  • Waterproof Bags or Cases: Protect gear during transport or long events.
  • Lens Filters: UV or clear protective filters shield your lens glass from rain or grit.
  • Microfiber Cloths: Quickly wipe away droplets without scratching surfaces.
  • Silica Gel Packs: Prevent moisture buildup in your gear bag.

Techniques for Shooting in Challenging Weather

When the weather turns rough, the right approach can make a huge difference. Here are a few strategies professional sports photographers swear by:

  1. Plan for the Environment: Check forecasts and prepare appropriate covers and cleaning tools.
  2. Adjust Your Settings: In low light caused by clouds or rain, open your aperture wider or raise ISO carefully.
  3. Use Burst Mode: Rain and snow can distort focus. Shooting in bursts increases the chance of crisp frames.
  4. Mind the Light: After storms, diffused light creates soft shadows and vibrant colors — perfect for dynamic action shots.
  5. Protect Between Shots: When possible, shield your camera under a jacket or umbrella until the action begins.

Post-Shoot Care: Maintaining Weatherproof Gear

Proper maintenance keeps your equipment in top shape for the long run.

  • Dry Thoroughly: After exposure to rain or humidity, wipe gear dry with a soft towel.
  • Inspect Seals and Ports: Check for debris or moisture around buttons and seams.
  • Store Correctly: Keep gear in a dry, temperature-controlled environment.
  • Regular Servicing: Have your camera inspected periodically by professionals for seal integrity.

Common Mistakes to Avoid

  • Assuming Weatherproof Means Waterproof: Even the best-sealed cameras can’t handle full submersion.
  • Ignoring Lens Pairing: Using an unsealed lens on a weather-sealed body invites moisture and dust inside.
  • Skipping Maintenance: Small cracks or worn seals can compromise protection over time.
  • Underestimating Cold Effects: Batteries drain faster in low temperatures — carry extras.
source: Paul Rutherford

Conclusion

For sports photographers, unpredictable weather doesn’t have to be a limitation. Investing in weatherproof gear ensures you’re ready to capture decisive moments — from rain-soaked football matches to sun-drenched cycling tours — without worrying about your equipment. The right combination of gear, preparation, and care empowers you to deliver exceptional images in any condition.

With experience and reliable tools, you’ll learn that sometimes, the best sports photos come from the toughest conditions — when the elements meet the action and you’re ready to capture it all.

The written content on this page was generated by ChatGPT.
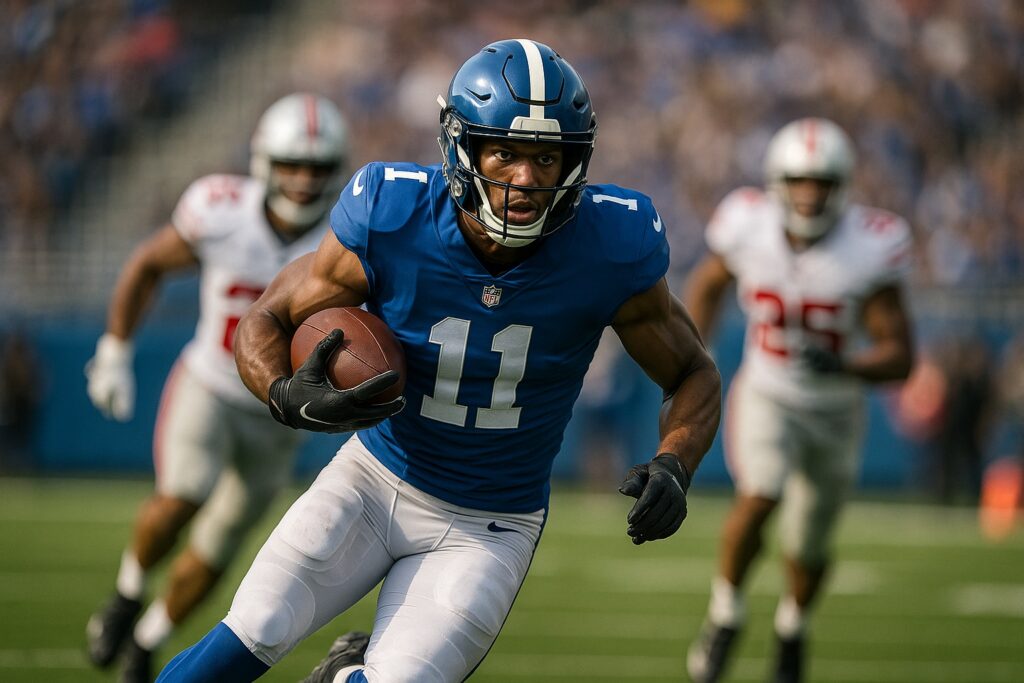
How to Use Telephoto Lenses to Capture Close-Up Sports Action

Few moments in photography are as thrilling as freezing an athlete in mid-stride or capturing the grit on a player’s face from across the field. Sports photography is about anticipation, timing, and precision—and a telephoto lens can be your most valuable ally in achieving all three. These lenses bring faraway subjects up close, giving your images the intensity and focus that turn ordinary sports shots into works of art. But mastering a telephoto lens isn’t as simple as zooming in; it requires a deeper understanding of optics, technique, and timing.

In this guide, we’ll explore how to use telephoto lenses to capture dynamic, close-up sports action. You’ll learn how to select the right lens, optimize your camera settings, stabilize your shots, and anticipate those fleeting moments that define athletic competition.

How to Use Telephoto Lenses to Capture Close-Up Sports Action

The Power of Distance: Why Telephoto Lenses Are Essential

At first glance, the advantage of a telephoto lens seems obvious—it lets you photograph distant subjects. But what makes it indispensable for sports photographers is more nuanced. A good telephoto lens doesn’t just magnify; it compresses perspective, pulls your subject closer to the background, and isolates the action beautifully. This compression adds drama and depth, transforming a crowded stadium scene into a focused, storytelling image.

When used correctly, telephoto lenses allow you to portray emotion, movement, and detail all in one frame. You can capture the determination in a sprinter’s eyes, the tension of a goalkeeper’s stance, or the triumph of a finish-line celebration—all while standing safely on the sidelines.


Choosing the Right Telephoto Lens

Not all telephoto lenses perform the same, and your choice depends heavily on the type of sport and shooting conditions. Understanding focal lengths is the first step to making a smart investment.

  • 70–200mm: A versatile workhorse for field and indoor sports such as basketball, volleyball, or soccer. The zoom range gives you flexibility to frame mid-range and tighter action without constantly changing lenses.
  • 300mm to 400mm: Ideal for outdoor events like baseball, tennis, and cycling. These focal lengths provide reach without sacrificing image sharpness or focus speed.
  • 500mm and Beyond: Best suited for large venues and motorsports. These lenses are powerful but often require a monopod or tripod for support due to their weight.

Zoom lenses offer convenience and adaptability, while prime telephoto lenses (fixed focal lengths) provide superior sharpness and faster apertures. Your choice will depend on your shooting style, access distance, and the lighting conditions of the sport.


Mastering Camera Settings for High-Speed Action

Shooting sports with a telephoto lens requires more than a steady hand—it demands precise camera settings to capture sharp, high-impact images. Here’s how to dial in your setup:

  • Shutter Speed: Fast shutter speeds are essential for freezing motion. Start at 1/1000s for most sports, but adjust according to movement. For creative blur that conveys motion, drop it to 1/250s or slower.
  • Aperture: A wide aperture (f/2.8 to f/4) allows more light into the lens and isolates your subject from the background, giving that professional, cinematic look.
  • ISO: Keep ISO low in bright daylight (100–400) and increase it in low light. Don’t hesitate to push ISO higher if it means maintaining a fast shutter speed.
  • Autofocus Mode: Use continuous autofocus (AF-C or AI Servo) to track subjects as they move unpredictably across the field.
  • Burst Mode: Continuous shooting ensures you don’t miss critical moments—especially in sports where expressions and body movements change in milliseconds.

Techniques for Sharp, Impactful Telephoto Shots

  1. Stabilization Matters: Telephoto lenses magnify not only the subject but also camera shake. A monopod offers a perfect balance between mobility and stability, especially during long events.
  2. Follow the Motion: Practice smooth panning to match the athlete’s movement. This helps retain clarity while maintaining a sense of speed.
  3. Anticipate the Play: Study the rhythm of the sport. Predict where the ball, runner, or player will be before the action happens. The best shots often come from being ready, not reacting.
  4. Use Focus Limiting: If your lens has a focus limiter, activate it to prevent the camera from hunting across unnecessary ranges.
  5. Compose Thoughtfully: Leave room in front of moving subjects to convey direction and purpose. A tight crop can be powerful, but balance it with storytelling context.

Perfecting Shots Through Post-Processing

Post-processing is where great photos become unforgettable. Even perfectly exposed telephoto shots benefit from fine-tuning.

  • Enhance Clarity and Detail: Boost micro-contrast and sharpness to emphasize sweat, fabric texture, and motion.
  • Adjust White Balance: Sports venues often mix natural and artificial lighting—correcting color temperature ensures accurate tones.
  • Crop Intelligently: Tighten your frame to draw focus to the athlete’s expression or moment of impact.
  • Reduce Noise: Long lenses in low light can introduce grain. Noise reduction tools in Lightroom or Photoshop can help retain quality without losing detail.

Mistakes to Watch Out For

Even experienced photographers make errors when using telephoto lenses. Avoid these pitfalls:

  • Over-Zooming: Filling the frame too tightly limits your ability to track motion or recompose quickly.
  • Shaky Hands: Even a small tremor can blur the image. Use lens stabilization or physical supports whenever possible.
  • Ignoring Backgrounds: A cluttered or bright background can pull attention away from the subject. Adjust your position or aperture to create clean, minimal backdrops.
  • Neglecting Light Direction: Backlighting can add drama, but too much can wash out the subject. Move around the field to find the best light angles.

Real-World Example: The Energy of a Cycling Race

Imagine standing at a bend during a cycling competition. You position your 300mm lens, pre-focus on the curve, and wait. As the riders lean into the turn, you pan smoothly, following the lead cyclist while maintaining a fast shutter speed. The result? A razor-sharp subject with just enough background blur to capture the rush of motion. That’s the art of telephoto sports photography—precision, patience, and instinct working together.

source: B&H Photo Video Pro Audio

Final Thoughts

Telephoto lenses are more than tools for magnification—they’re extensions of your vision. They allow you to capture the raw essence of sports: effort, motion, and triumph. With the right combination of gear, technique, and intuition, you can transform fleeting moments into timeless images.

Whether you’re documenting a championship game, a local marathon, or a fast-paced cycling race, a telephoto lens helps you bridge the gap between distance and intimacy. Every frame becomes a chance to tell the story of passion and perseverance—one click at a time.

The written content on this page was generated by ChatGPT.
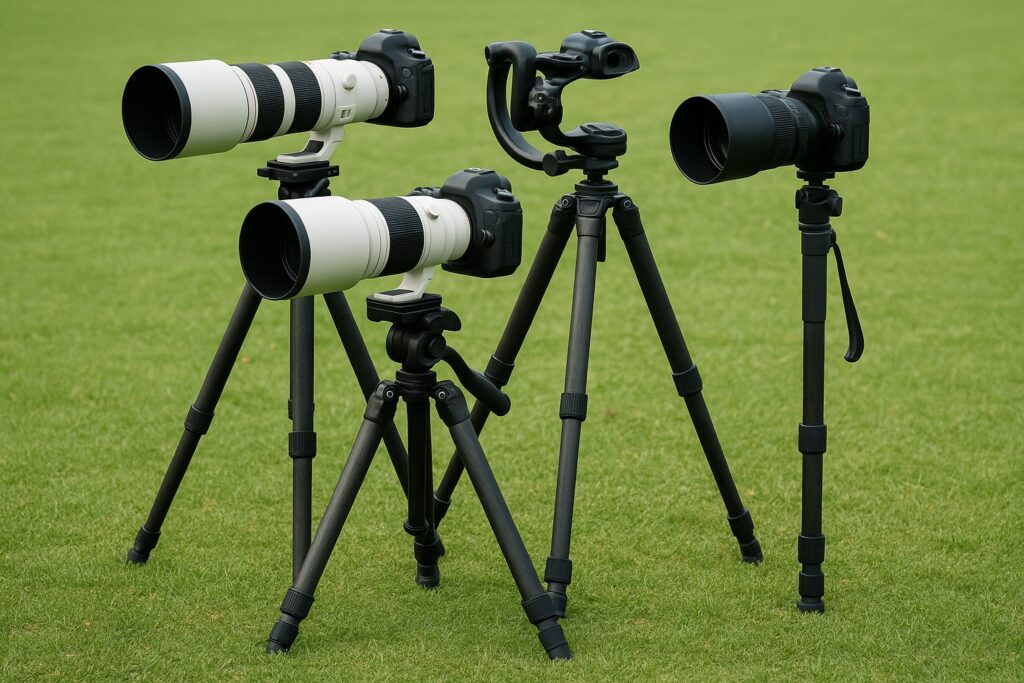
Tripods vs. Monopods: Finding Stability in the Fast-Paced World of Sports Photography

Photographing sports isn’t just about timing your shutter right—it’s also about staying steady in the chaos. Whether you’re tracking a soccer player sprinting toward the goal, capturing the arc of a tennis serve, or freezing the moment a cyclist hits top speed, having reliable support for your camera is critical. Without it, even the best composition can fall apart due to blur or poor framing. That’s where tripods and monopods step in.

But choosing between the two (and knowing which models perform best) can be tricky. In this guide, we’ll dive into why stability matters in sports photography, examine the real-world pros and cons of tripods versus monopods, and recommend standout options for both amateur and professional photographers alike.

Tripods vs. Monopods: Finding Stability in the Fast-Paced World of Sports Photography

The Hidden Advantage of Stability

Many sports photographers get caught up in chasing faster shutter speeds and forget a fundamental rule—stability equals sharpness. Even with a powerful lens, slight vibrations can cause motion blur, especially during prolonged sessions or in low light. A stable camera platform gives you more control, sharper images, and less physical strain over time. And when your lens is heavy (think 300mm and beyond), shooting handheld becomes less of an option and more of a liability.

Tripods or Monopods: Which One Belongs in Your Kit?

Let’s break it down:

Tripods are best for static shooting situations. If you’re covering an event where you have a designated spot—like a finish line, corner flag, or elevated press box—a tripod gives you rock-solid support. You can mount your camera, compose your frame, and wait for the action to unfold.

Monopods, on the other hand, shine in fast-paced, mobile environments. They’re easier to carry, faster to set up, and allow for greater flexibility in positioning. They’re the go-to tool for sideline shooters who need to follow the action without lugging around a bulky tripod.

Top Tripods for Sports Photographers

1. Manfrotto 055 Aluminum Tripod

This tried-and-true model has long been favored by sports and wildlife photographers for its dependable build and smooth adjustments. Its quick power lock system and multi-angle center column make it adaptable for tough angles and uneven terrain.

  • Weight: 5.5 lbs
  • Max Height: 66.9 inches
  • Load Capacity: 19.8 lbs
  • Ideal For: Heavier DSLR setups, long telephoto lenses

2. Gitzo GT3543LS Systematic Series 3

If you need serious support in the field, this carbon fiber tripod delivers. It’s modular, strong, and light enough to carry to remote locations. It’s built for professionals who don’t want to compromise on stability.

  • Weight: 4.3 lbs
  • Max Height: 57.5 inches
  • Load Capacity: 55 lbs
  • Ideal For: Studio-quality sports shooting in outdoor conditions

3. Benro Mach3 TMA38CL Carbon Fiber Tripod

Benro’s carbon fiber line offers an excellent balance of performance and price. It’s lightweight enough for travel but stable enough for serious gear. Its rubber feet can be swapped for metal spikes—perfect for fields and stadiums.

  • Weight: 4.5 lbs
  • Max Height: 69.7 inches
  • Load Capacity: 35.3 lbs
  • Ideal For: Versatile sports photography across different terrains

Leading Monopods That Excel in the Field

1. Manfrotto XPRO Monopod+

Quick to deploy and built like a tank, the XPRO Monopod+ is one of the most trusted tools for fast-action shooters. The fluid base option adds stabilization during pans and tilts, especially helpful during side-to-side tracking.

  • Weight: 2.4 lbs
  • Max Height: 79.9 inches
  • Load Capacity: 17.6 lbs
  • Best For: Sideline sports where rapid movement is required

2. Sirui P-326 Carbon Fiber Monopod

This six-section monopod folds down small, yet extends tall enough for comfortable eye-level shooting. Its foam grip and wrist strap add security, and the carbon fiber construction means it’s light enough for long shoots.

  • Weight: 0.9 lbs
  • Max Height: 61.4 inches
  • Load Capacity: 22 lbs
  • Best For: Travel and quick setup without compromising durability

3. Gitzo GM4552L Series 4 Monopod

With industrial-grade carbon fiber and a maximum load capacity of over 60 lbs, this Gitzo monopod is ideal for photographers using large, fast lenses. It’s longer than most models, giving added reach at field events or racetracks.

  • Weight: 1.5 lbs
  • Max Height: 74.8 inches
  • Load Capacity: 66 lbs
  • Best For: Pro-level gear and demanding environments

Practical Tips for Maximizing Stability at Events

  • Scout the Venue: Arrive early and identify where tripods are permitted. Some stadiums prohibit them outside designated media zones.
  • Use a Gimbal or Ball Head: These allow smooth, fluid movement while keeping your camera balanced.
  • Avoid Full Extension: Only extend the legs or monopod column as much as needed. Overextending compromises stability.
  • Support with Your Body: Use your legs or arms to anchor your gear, especially with monopods.
  • Balance the Load: Make sure your camera is properly mounted and centered to prevent tipping or slipping.
source: Beyond the Game

Invest in Stability to Elevate Your Work

In the world of sports photography, a split-second can mean the difference between a forgettable photo and a gallery-worthy capture. Don’t let poor stability hold you back. Whether you need the fixed security of a tripod or the nimble support of a monopod, investing in quality gear pays off in sharper images, smoother motion tracking, and less fatigue.

These tools are more than accessories—they’re extensions of your shooting technique. When matched with the right strategy and setting, a tripod or monopod can help you confidently shoot the high-speed action that defines sports photography.

The written content on this page was generated by ChatGPT.